This decadent cookie recipe uses dutch cocoa and dark chocolate pieces to create a double delicious chocolate biscotti. Furthermore, this cookie recipe is easy to prepare, outlined with simple to follow steps.
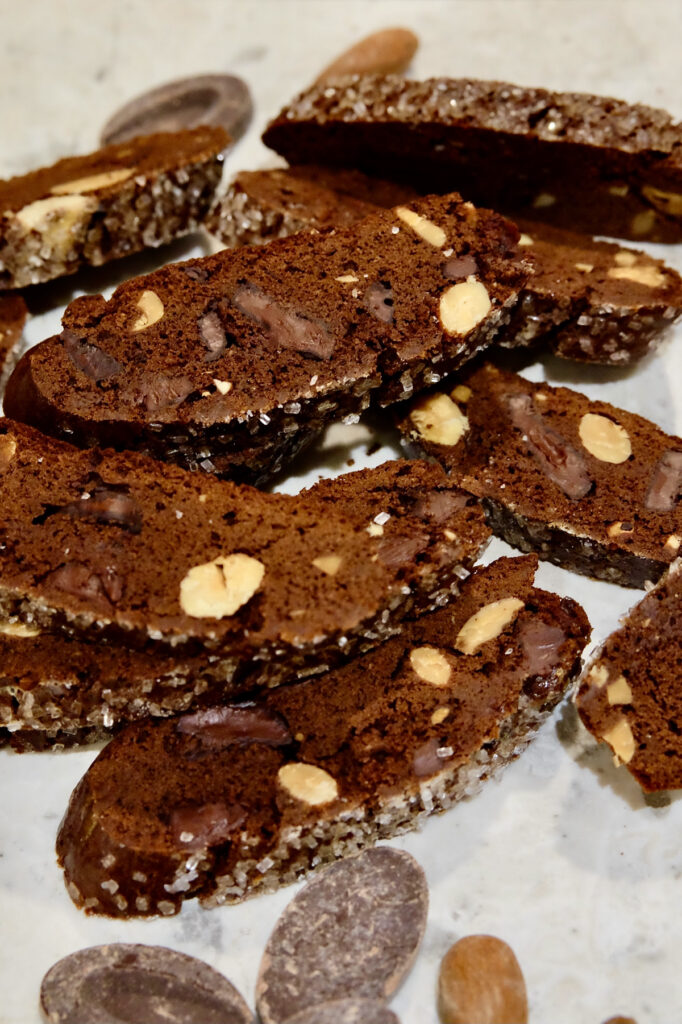
Turn tea or coffee time into a reward with this double delicious chocolate cookie. Dutch cocoa powder brings the chocolate flavor forward. But the addition of dark chocolate disks is what makes this biscotti a special treat.
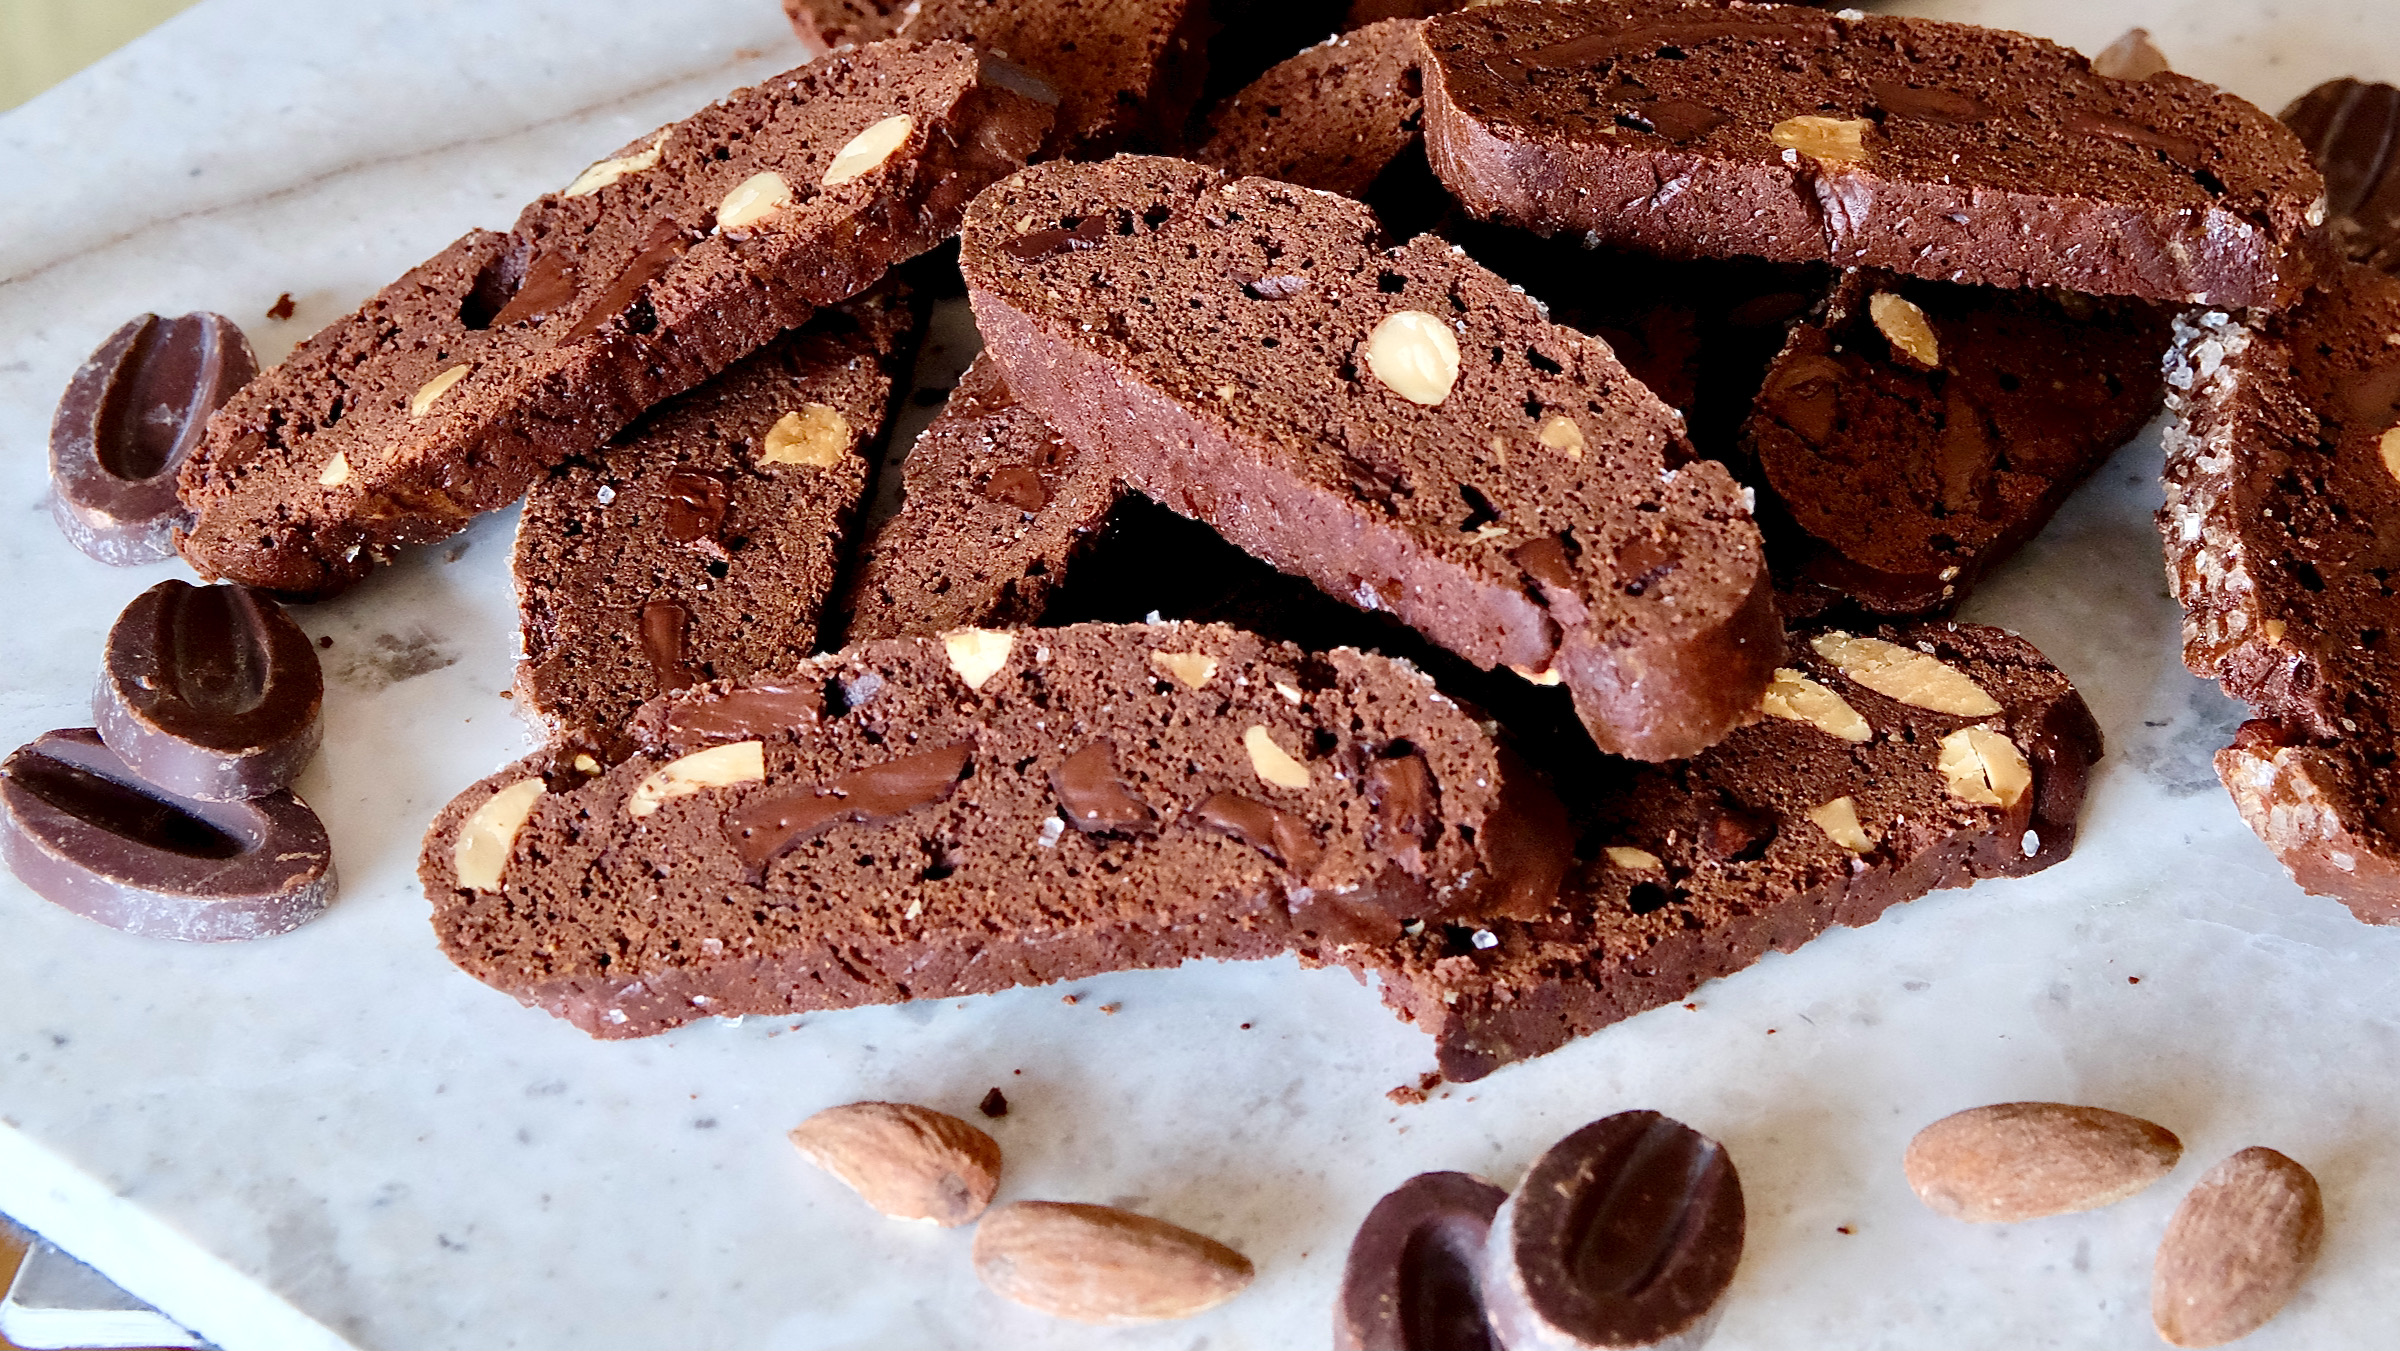
Double down with Chocolate Biscotti and melted ribbons of Dark Chocolate
Everyone loves chocolate! And what could possibly make a lovelier gift than a chocolate cookie? Especially one dotted with creamy pockets of dark chocolate ribbons melted throughout. Add to this combination a speckling of almonds and it’s a win, win! While this chocolate biscotti recipe is one of my go to’s for holiday gift giving. It is equally enjoyed all year round.
Easy Steps to Making Chocolate Biscotti
Making biscotti is much simpler than it looks. First of all there are no forms or special tools needed. In fact most kitchens are already outfitted with everything needed to make biscotti. Aside from your mixer, all that is required is saran wrap, a baking sheet, cutting board and your hands. Additionally, the most important tool used is a good sharp serrated knife. I prefer to use a bread knife.
Simple steps to creating biscotti
First make the dough following the ingredients list and directions below. Then follow the steps outlined below to guide the shaping and baking. For your reference, I have included photos.
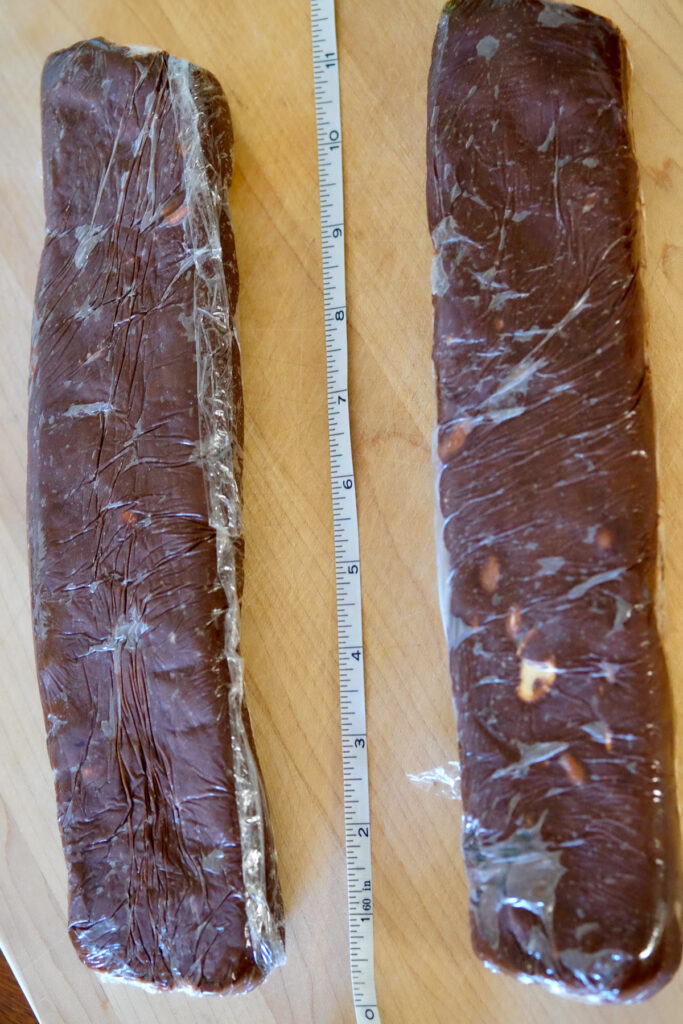
- Using your hands, shape the biscotti dough into a log, on a long sheet of plastic wrap. The log should measure approximately 4 1/2 inches wide by 11 inches long.
- Wrap the log in the plastic wrap and chill for at least 30 minutes.
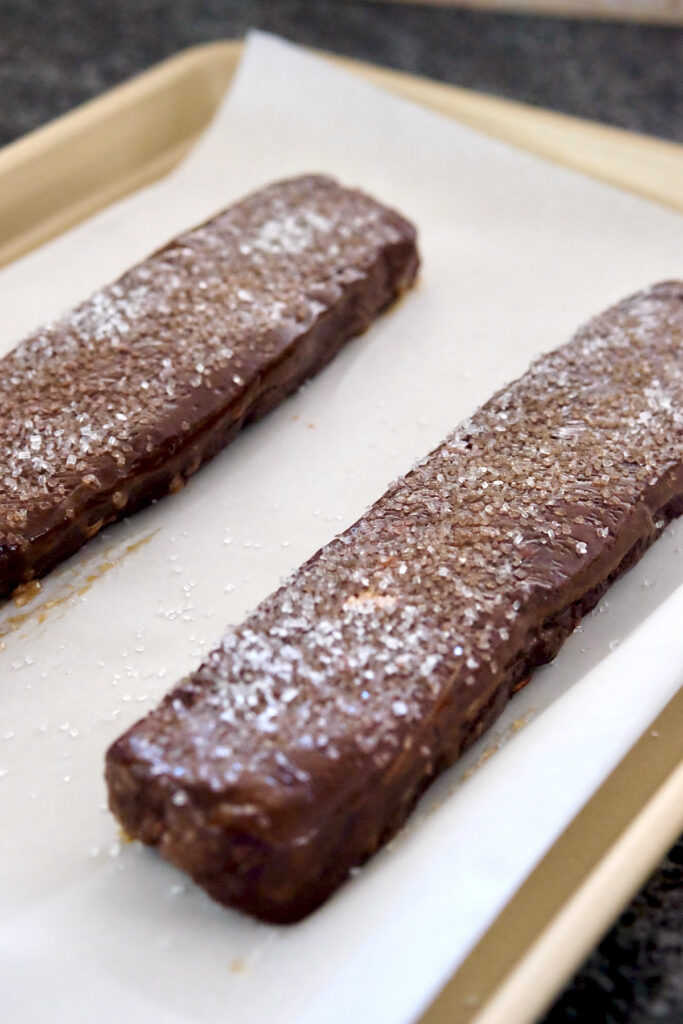
- Remove plastic wrap and place log on prepared baking sheet.
- Brush dough log with egg wash and sprinkle with sugar crystals if desired.
- Bake for 25-30 minutes or to an internal temperature of 190 degrees.
- Cool on baking sheet for 10 minutes, then transfer to a cooling rack until cool. If you wish to expedite this process, leave logs on the the pan and chill the in the refrigerator for 30 minutes.
- Turn oven down to 250 degrees.
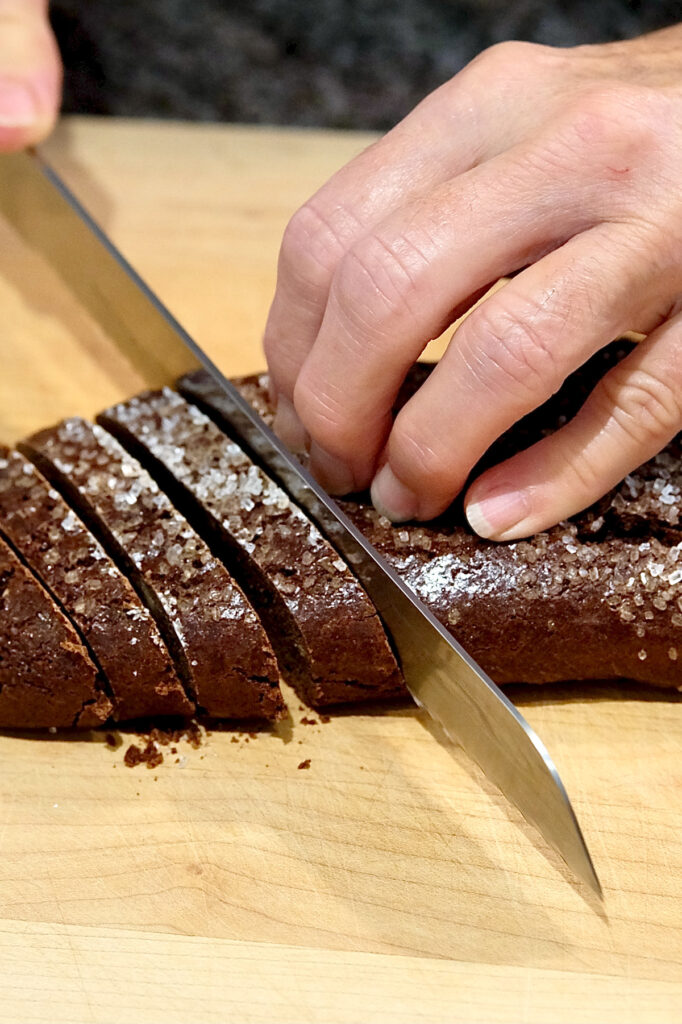
- Once the log is completely cool, use a serrated bread knife to cut the log into thin slices, about 1/4 inch wide.
- Continue cutting making evenly spaced cuts.
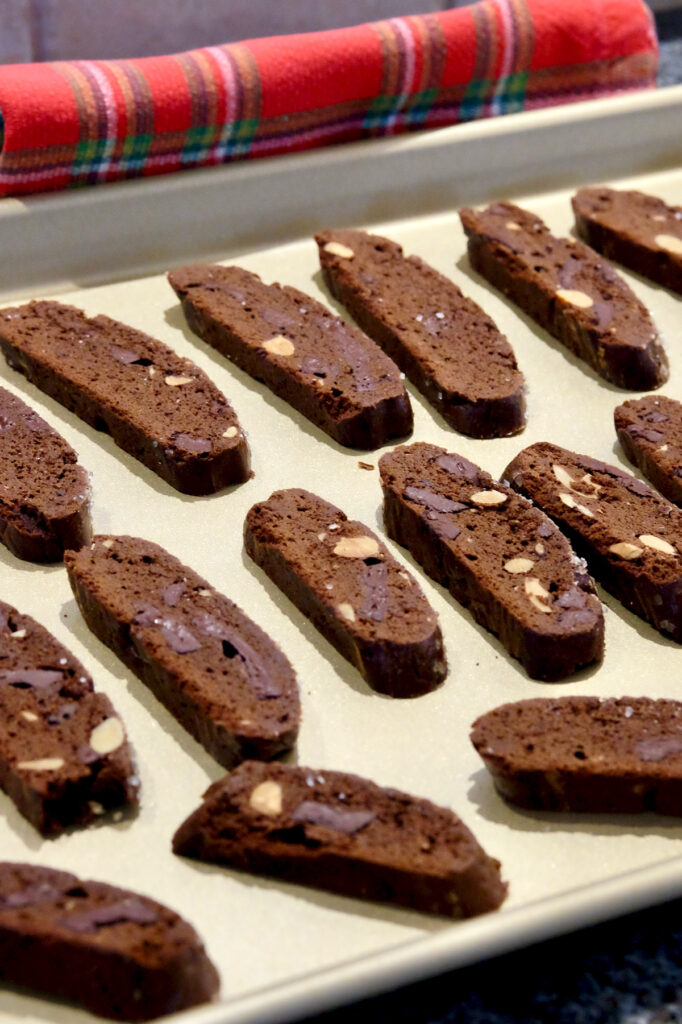
- Place biscotti cut side down on lined baking sheet.
- Bake for 12-15 minutes and remove from oven and allow to cool for 5 minutes.
- Turn biscotti over to other cut side and bake an additional 12-15 minutes.
- Remove from oven and allow biscotti to cool.
- Place on cooling rack.
- Once completely cool, store in air tight container.
Choosing Cocoa Powder for the best Chocolate Biscotti
As there are a variety of cocoa powders available to bakers these days, choosing the right one can be confusing. I myself have 5 different types of cocoa powder in my pantry. If you were to peer into my pantry, you would find Dutch, Double Dutch, Burgundy, Triple Blend and Black cocoa powders. While it may seem that they would all be interchangeable, they are not. For instance Dutch cocoa powder has a lower acidity level than national brands like Hershey’s cocoa and requires different leavening agents. They are all wonderful products but they have specific uses.
When baking this recipe I reach for King Arthur’s Burgundy Cocoa Powder. It is a dutch-processed cocoa with intense deep chocolate flavor. In choosing a cocoa powder for use in this cookie recipe, look for a dutch-processed cocoa powder. If you don’t have King Arthur’s Burgundy cocoa powder on hand, either of these brands will perform nicely, as well. Guittard makes a high quality dutch-processed cocoa powder. Equally as good is Droste, a dutch-processed brand of cocoa. Additionally both brands are widely available in supermarkets.
The Chocolate
Double the chocolate makes a double good chocolate biscotti.
It isn’t enough to have just a chocolate flavored cookie. In order to amp up the chocolate yumminess in this biscotti recipe, chocolate pieces are added to the dough. For deep rich chocolate flavor, I turn to dark chocolate feves made by Valrhona. My personal preference is to use bittersweet chocolate with a 62 percent cocoa content. But I realize that dark chocolate is not favored by all. Feel free to experiment with different types of chocolate. If milk chocolate is your favorite, by all means substitute the dark for milk. Or perhaps you would prefer to use a dark chocolate wafer with a different cocoa percentage, whether lighter or darker.
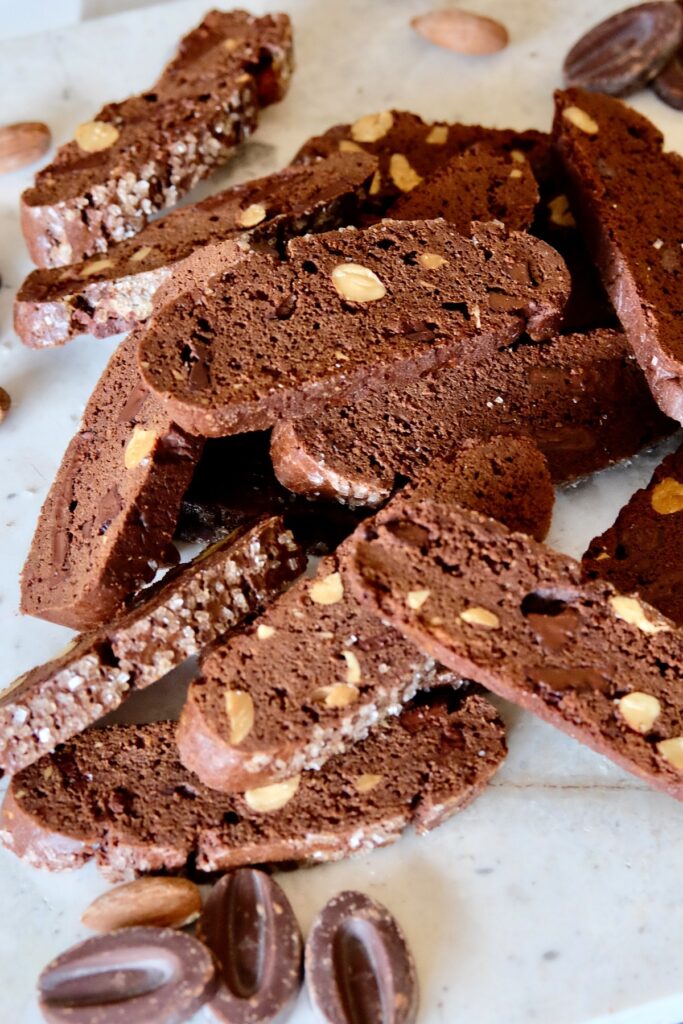
When choosing chocolate for this recipe, I recommend using baking wafers or feves. Chocolate chips or morsels, melt differently, and will not create smooth melted veins of chocolate, as pictured above . This is because chocolate morsels are made with less cocoa butter and often contain stabilizers. While baking chocolate is made with more cocoa butter and specifically designed to melt smoothly. If you are unable to find feves or wafers, try purchasing a good quality bar of baking chocolate like Lindt. In this way, the chocolate can be broken into smaller squares and used like wafers or feves.
 Buy Now →
Guittard, Organic 66% Chocolate Baking Wafers, 12 Ounce
Buy Now →Creating pretty biscotti
While biscotti is generally a rustic cookie, they don’t have to be. For a simple finish, simply brush the biscotti with egg wash. However creating an attractive biscotti for gift giving is easy. To create an attractive biscotti, simply sprinkle with sugar or sprinkles after applying the egg wash. Generally, I use sparkling white sugar to dress up my biscotti. If sparkling white sugar isn’t available, simply substitute with raw sugar. Perhaps you would rather use chocolate sprinkles, for a chocolate finish. After brushing the cookie log with egg wash, simply sprinkle the topping of choice over the top of the log. Then continue with the baking process.
The Nuts
While this recipe calls for almonds, it goes without saying that any nut may be substituted. This dark chocolate cookie dough pairs very nicely with hazelnuts. If nut allergies are an issue, simply omit the nuts.
Cooling Before Cutting
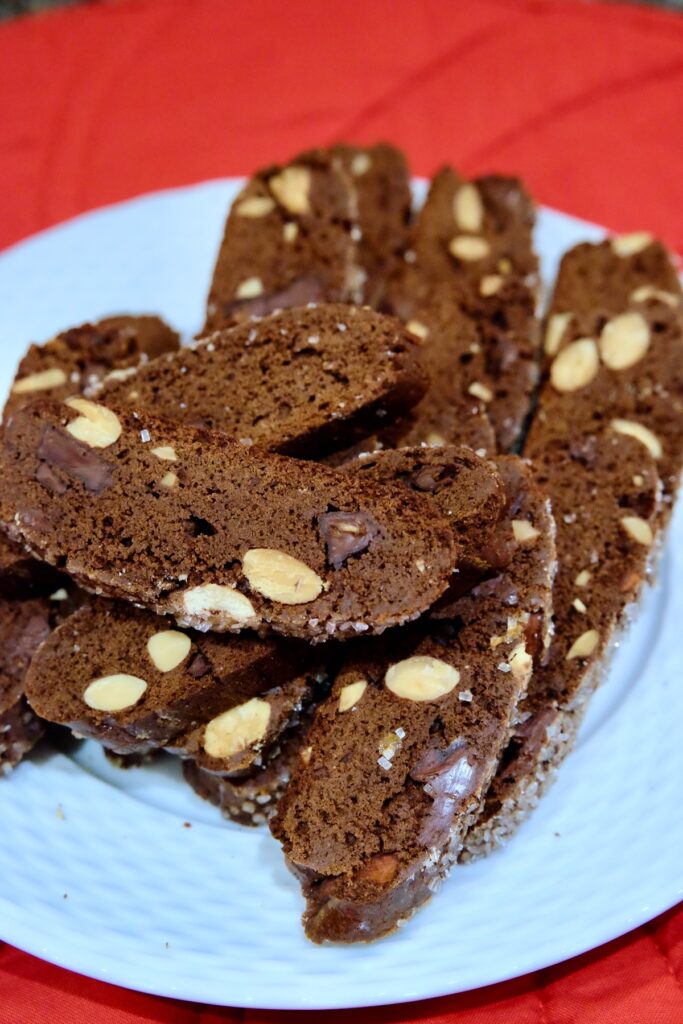
*Recently, I discovered this little tip*. Normally, the biscotti logs should cool at least 30-45 minutes before cutting. But due to unforeseen circumstances, my baked log had rested for 24 hours before I was able to begin cutting. As the chocolate had time to completely cool, I noticed that it did not smear when cut. Therefore, if you are off-put by chocolate smudges in your cut cookie slices, the fix is simple. Allow the baked log to cool for at least 8 hours before cutting.
Refrigeration speeds up the cooling.
In order to speed up the cooling process, chill the baked cookie logs in the refrigerator for 30 minutes. After the biscotti log has finished baking, allow to cool on the pan for 5-10 minutes. Then place the sheet pan in the refrigerator for 35-40 minutes. Chilling the baked logs allows the melted chocolate to firm up. After chilling, proceed with cutting into slices and the second bake.
Storing Biscotti
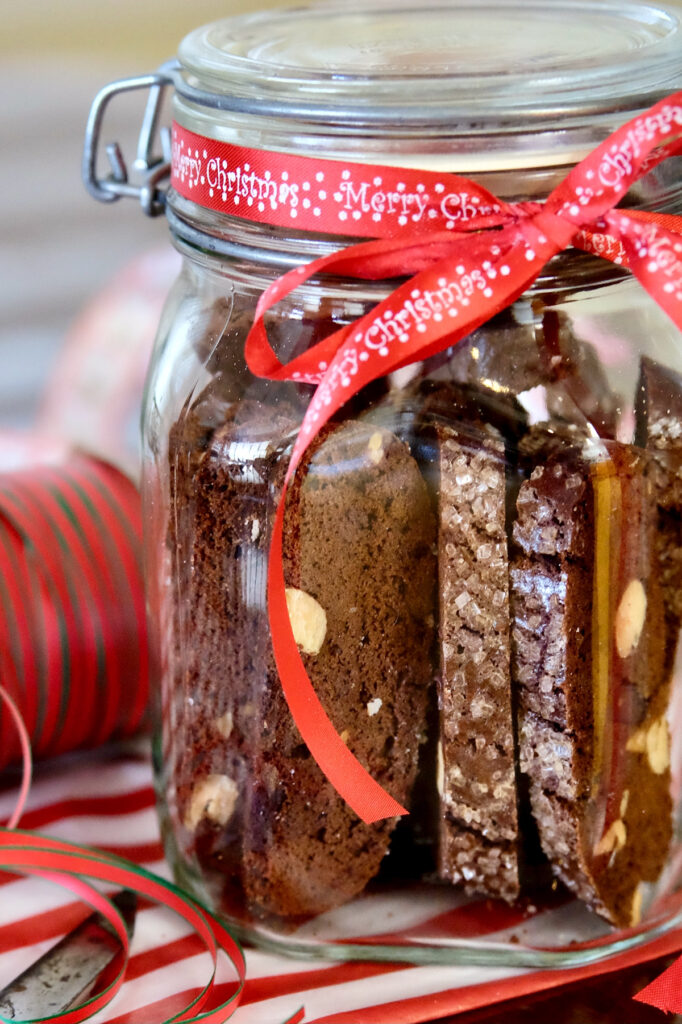
A one-liter jar will hold approximately 16-18 biscotti.

Bormioli Rocco – SYNCHKG122276 Fido Clear Glass Jar with 85 mm Gasket,1 Liter (Pack of 2)
Buy Now →Buon Appetito!
PrintEasy Double Chocolate Biscotti with Chocolate Ribbons
Chocolate Biscotti with veins of dark chocolate ribboned throughout the cookie is complimented by slices of almond. Serve this easy cookie recipe with your favorite coffee drink or with your favorite ice cream. Biscotti also are perfect for gift giving, as this Italian cookie travels well.
- Prep Time: 30 minutes
- Cook Time: 30 minutes plus an additional 24 minutes
- Total Time: 1 hour and 30 minutes
- Yield: 40–45 cookies 1x
- Category: Dessert/Baked Goods
- Method: Oven
- Cuisine: Italian
Ingredients
- 6 Tablespoons (90 grams) Butter, softened
- 1 cup (200 grams) Dark Brown Sugar
- 1 teaspoon (4 grams) Vanilla Extract
- 2 Large (90-100 grams) Eggs, (eggs vary in weight between 45–50 grams each)
- 1/2 cup (60 grams) Dutch Cocoa
- 2 1/4 teaspoons (9 grams) Baking Powder
- 1 teaspoon (2 grams) Espresso Powder
- 1 teaspoon (7 grams) Kosher Salt
- 2 cups (270 grams) All Purpose Flour
- 1 cup (140 grams) Dark Chocolate Disks – *I prefer Dark Chocolate Feves with 62% Cocoa
- 1/2 cup (76 grams) Whole Almonds, lightly toasted
FOR EGG WASH:
- 1 Egg
- 2 teaspoons Water
Instructions
TO PREPARE THE DOUGH:
- In the bowl of a stand mixer fitted with a paddle attachment, beat the butter and brown sugar until well incorporated.
- Add the vanilla and continue beating on speed 2 until the butter is creamy and light, about 4 minutes.
- Stop the mixer and scrape down the sides with a spatula.
- With the mixer set on speed 4, add the eggs one at a time, stopping the mixer occasionally to scrape down the sides.
- Continue to beat the butter mixture until the sugar breaks down and develops a smooth silky texture, about 10 minutes. To test, rub the butter mixture between your thumb and index fingers. It should feel smooth with very little abrasiveness from the sugar.
- Stop the mixer and add the flour, cocoa powder, salt, baking powder, and espresso powder. I highly recommend sifting the cocoa and baking powders through a flour sifter or fine sieve. This step will help to eliminate any clumping, especially if you live in a high humidity climate.
- Using a spatula, gently hand mix the flour into the butter mixture, just until the flour starts to blend into the butter. (This step will reduce the loss of flour exploding into the air.)
- With the mixer on low speed continue to beat just until the flour is thoroughly combined.
- Stop the mixer to scrape down the sides.
- With the mixer set on low speed add the toasted almonds and chocolate pieces, beating until just combined, about 1 minute.
- Remove the paddle and remove the bowl from the mixer.
- Divide the dough into two halves, approximately 440 grams each and place each half on a sheet of plastic wrap. Side Note: This dough is very dense with a fudge-like texture causing some of the chocolate pieces and nuts to fall out. It may be necessary to redistribute these strays by pushing them back into the dough.
- Form each dough ball into a log using your fingertips slightly dampened with water. The log should be about 10 inches long by 2 1/2 inches wide and 1 inch in thickness. Wrap each log in the plastic wrap and continue to shape the sides of the log by gently dropping each side onto a flat surface. Secure the ends of the plastic wrap and chill for one hour. (This cookie dough will keep for 3-4 days refrigerated, should you prefer to bake the biscotti at another time.
BEFORE BAKING:
- Preheat the oven to 350 degrees F.
- Line a baking sheet with parchment paper or a Silpat.
- Make egg wash by placing both the egg and water in a glass pyrex. Whisk to combine. Alternatively, I prefer to mix my egg wash in a small glass lidded jar by shaking the egg and water together until combined. (Then it can easily be stored in the refrigerator for a day or two, if I am going to be baking more cookies. Additionally, the leftover egg wash can be utilized in my next mornings breakfast scramble, eliminating any waste.)
- Unwrap each cookie log and place on the prepared baking sheet at least 3 inches apart from each other.
- Brush each log, both the top and sides, with egg wash. (If you desire to make a prettier finished biscotti, sprinkle the top of each log with coarse white sugar or raw sugar. However this step is optional.)
- Bake until the tops are cracked and firm, 30 to 35 minutes or a digital thermometer registers 190 degrees F.
- Remove from oven and let logs cool on pan for 10-15 minutes. Then transfer to a cooling rack for at least 30 minutes. Note: I have found that letting the cookies cool for a few hours before cutting helps to eliminate the smearing of melted chocolate. This step isn’t necessary, it is strictly for aesthetics.
- Reduce the oven to 250 degrees F. And transfer the logs to a clean cutting board (one without lingering onion odors).
- Using a serrated knife, gently cut the logs crosswise on a slight diagonal into 1/2 inch slices. (See pictures above.)
- Place the cookie slices, cut side down, on the same baking sheet. (It is helpful to place the biscotti facing the same direction. When it is time to turn the cookies over to bake the other side, there is no confusion of which cookies have been turned over.)
- Place in the reduced-heat oven and bake for 15 minutes. Remove from the oven and let cool for 5 minutes before turning over to the other cut side.
- Place baking sheet back in the oven and bake an additional 12 minutes. Remove from oven and let cool for 5 minutes.
- Transfer biscotti to a cooling rack and allow to cool completely before storing.
- Store biscotti in a sealed air-tight jar. Biscotti may also be frozen by placing in a heavy-duty freezer bag before freezing. Simply defrost to room temperature and serve.

