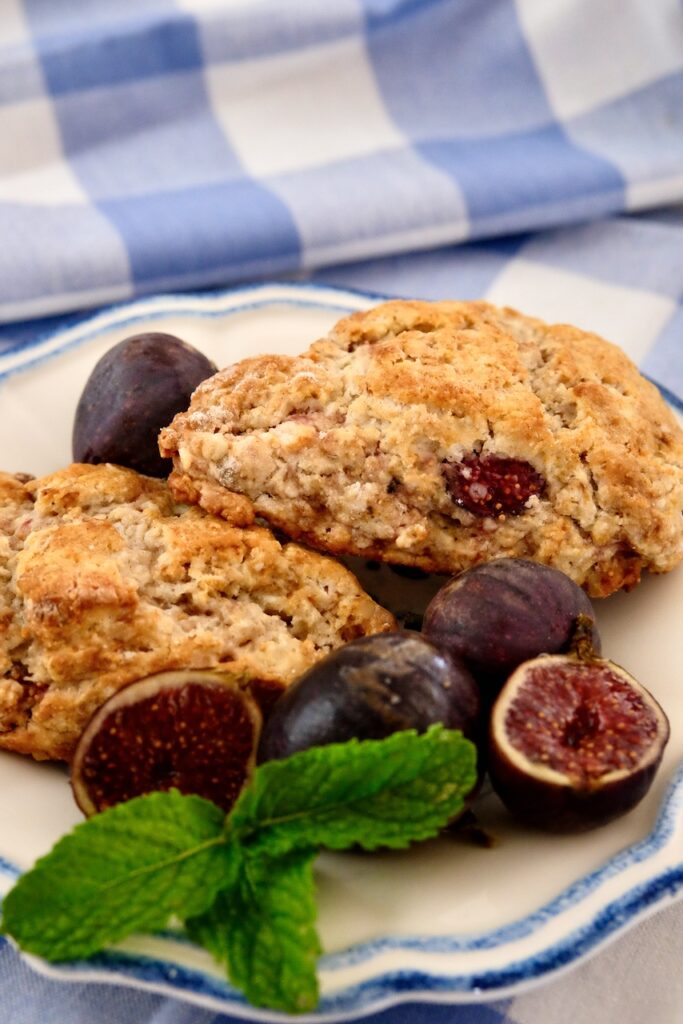
Fresh figs bring jammy sweet goodness to these scones made with walnuts and a hint of cinnamon. The beginning of fig season is upon us and what better way to make use of this delicious fresh fruit. Figs are a sweet gift from nature that every Italian looks forward to devouring. And with a wide variety of fresh figs available from now through fall, these scones are a delicious way of incorporating this sweet gem into breakfast and brunch.

If you don’t have a fig tree, it is essential to rely on their availability at your favorite market. But if you are lucky enough to a have a neighbor or friend with a fig tree as I am, you are blessed. And either way, you will surely enjoy this fresh fig recipe. Kimmie is my golden girl who provides me with a bounty of delicious figs every year. Therefore, Kimmie this recipe was designed with you in mind, as my thank you to you! These gorgeous figs are from her tree.
Scones made with fresh figs for breakfast, brunch or snack.
While scones are not a daily breakfast meal in my home, they are a special treat. While I love my daily breakfast routine, even I need a break from eggs and toast. Some may ask why indulge in high calorie breakfast treats like scones and biscuits. My answer is that we all need to allow ourselves to enjoy the foods we love. If not, it becomes too easy to fall into the dull humdrums of our daily routine. And before you know it, you’ve gone off the rails. Or as I like to put it, I’ve fallen off the Weight Watcher Wagon. Therefore, I allow myself to take a break once a week. I can offset a high calorie breakfast with making smart choices the rest of the day.
Fresh Figs versus Dried Figs
Generally speaking both fresh figs and dried figs make delicious scones. However, I cannot overstate the fact that dried figs cannot replace fresh figs in this recipe. If dried figs are used, the finished scones will be very dry. This is because this recipe has been altered to factor in the moisture content of fresh figs. So please use only fresh figs for this recipe.
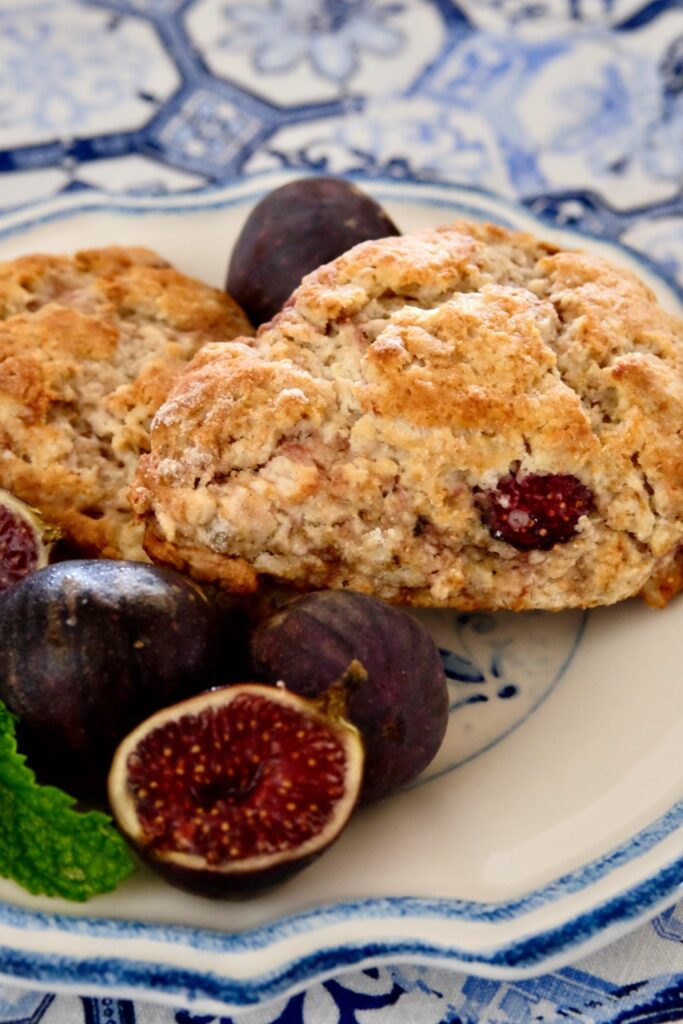
The perfect fresh fig for your scones.
Some of the best figs can be purchased at a farmers market. Or better yet from a wonderful friend. A ripe fig should be soft but not mushy. As figs have very thin skins, they need to be handled with care. Be very gentle with this delicate fruit.
Ripe figs often emit a sticky dewy drop from the underside of the fig. This is a good indicator of sweetness and that it is ready to be enjoyed. Figs that contain dewy bottoms, are ready to be consumed or baked immediately. If not, they can spoil very quickly. Keep soft, ripe figs refrigerated.
Figs purchased in supermarkets are usually under-ripe. This is because they are too delicate to travel when fully ripened. To allow your figs to ripen, place them on their sides on a plate lined with a paper towel. Set on a counter-top and leave at room temperature. But keep an eye on them. When the figs begin to soften, place then in the refrigerator and store for up to a week.
There are a number of fig varieties, but one of my favorites for this recipe is the Black Mission Fig.
Fresh Scones with Fig and Walnuts
Walnuts make a delicious accompaniment to figs. If you are not a fan of walnuts, perhaps you would prefer to try this scone recipe with hazelnuts or pecans. Yet, there is always the chance that you have nut allergies. In this case, simply omit the nuts from the recipe. The jammy fruit of the baked figs will not disappoint.
Tips to Fresh Tender Fig Scones
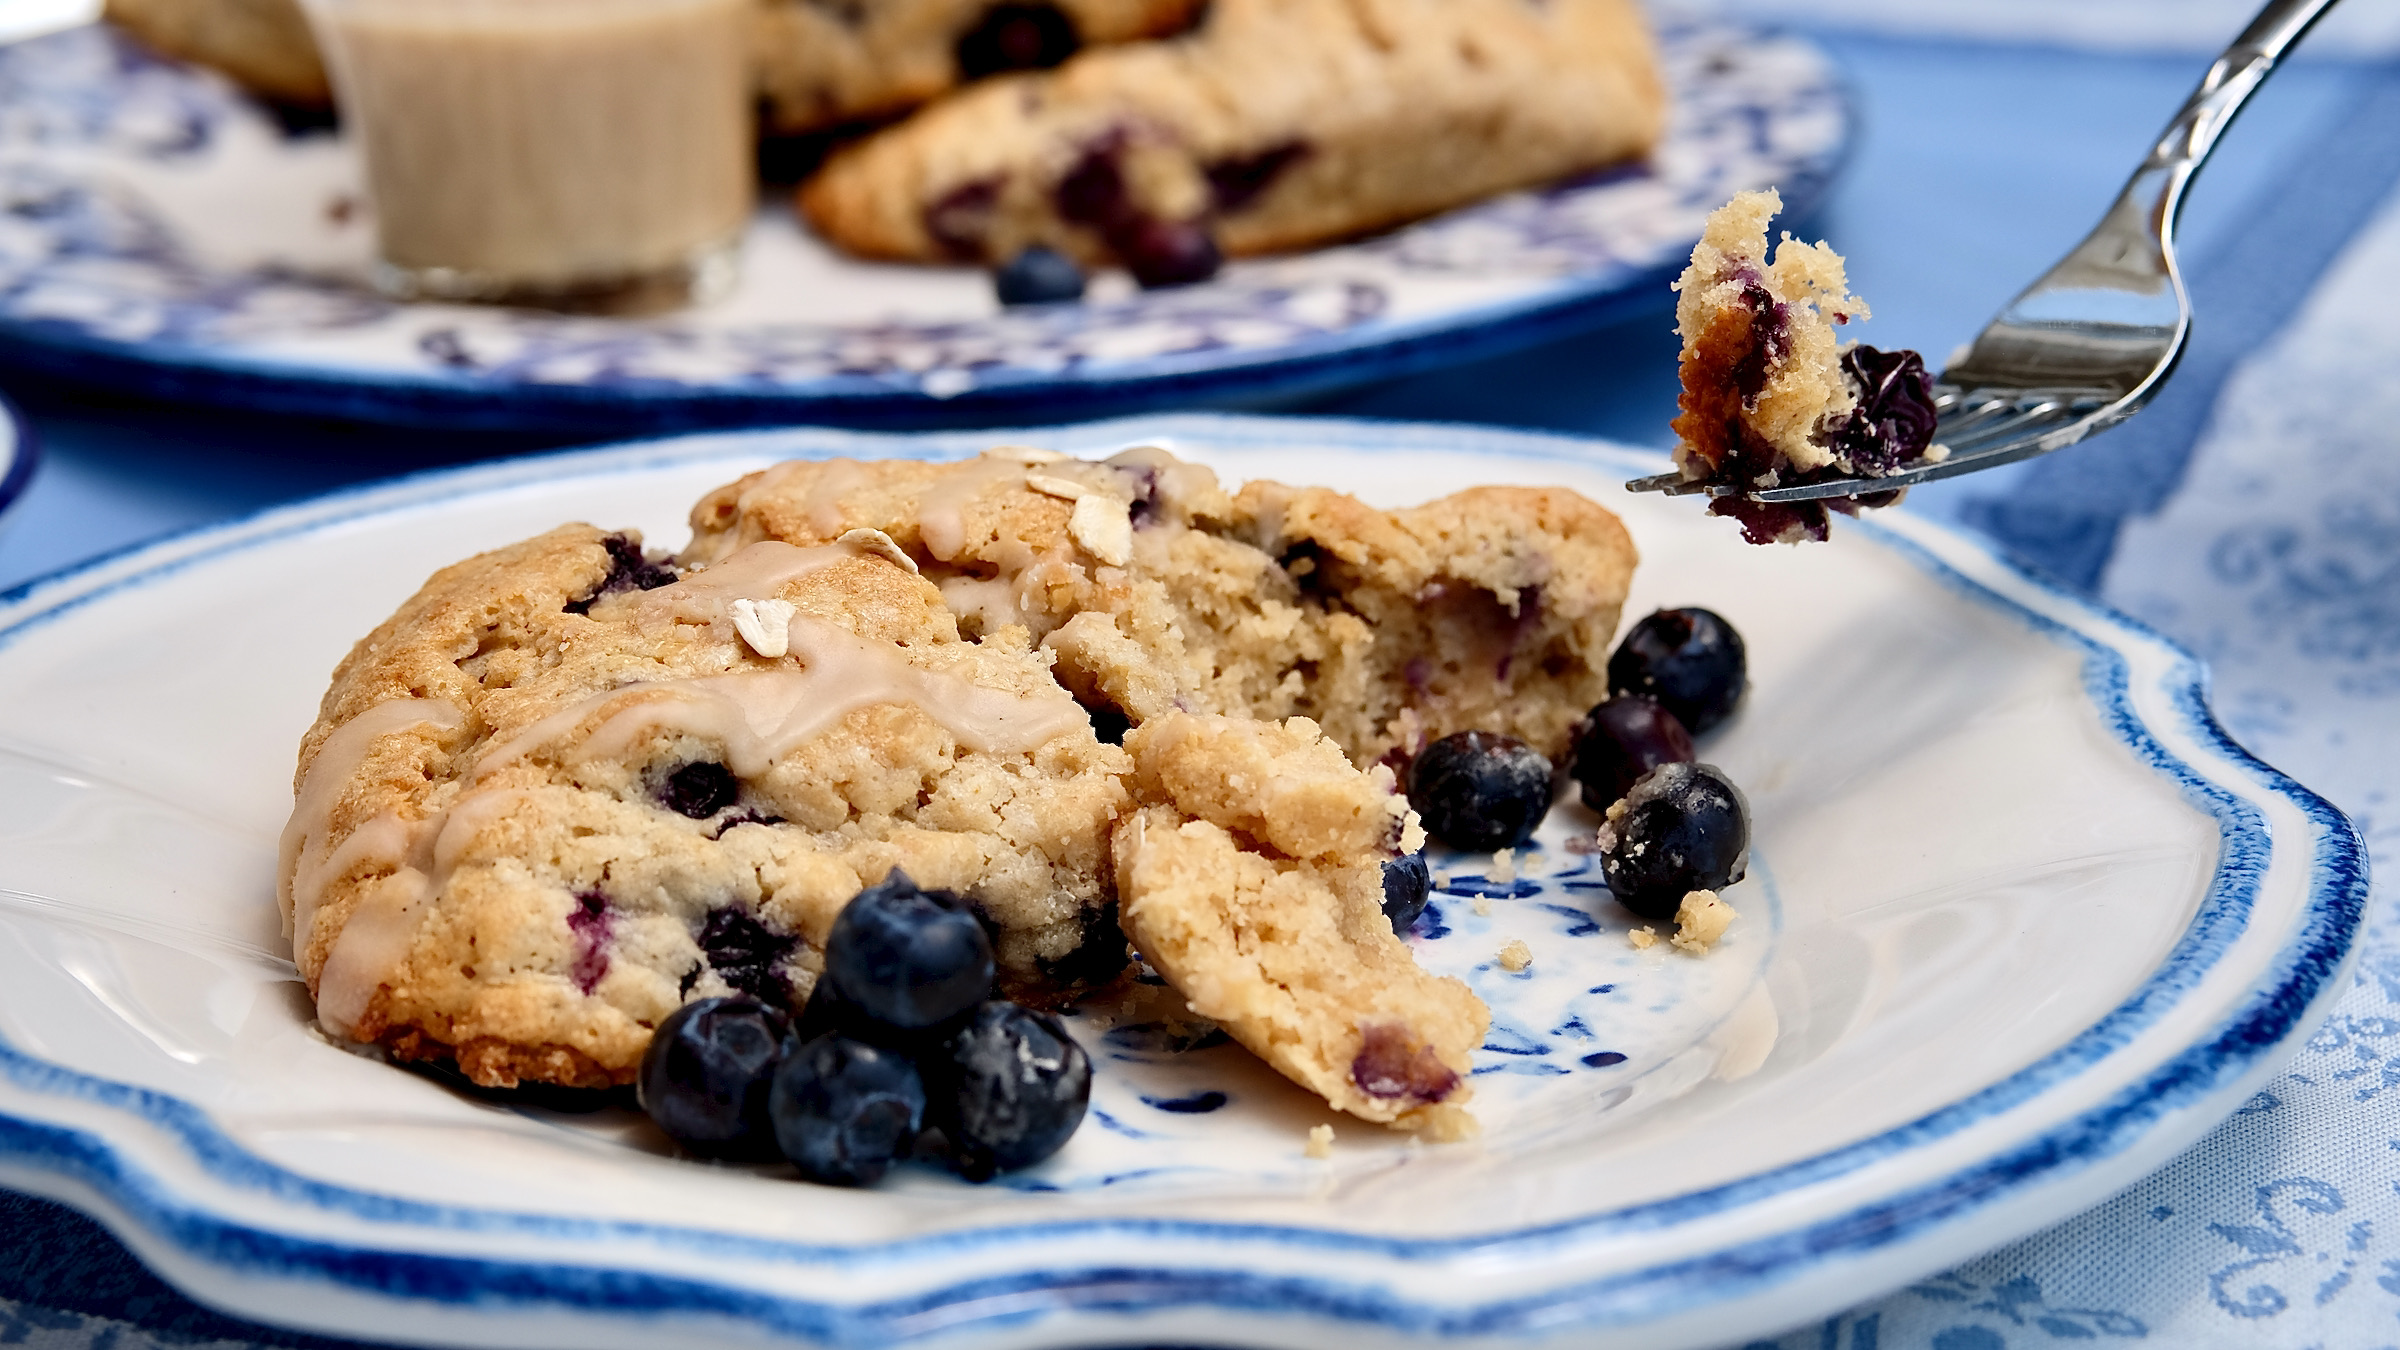
While making scones are quite simple, it can be overwhelming if this is your first go at it. Over the years I have developed a few techniques that will help to ensure perfect scones. And perhaps when figs are out of season, you may like to try this scone recipe for Oatmeal and Blueberry Scones. My oatmeal scone recipe is made with fresh or frozen blueberries, and topped with a yummy Maple Glaze.
Whether making Fresh Fig Scones or Blueberry Scones…..
These tips and pictures will serve as a guide to help you.
For The Dry Ingredients:
- Choose a bowl large enough to accommodate both dry and wet ingredients. However, make sure the bowl is small enough to fit into your freezer.
- To prepare the figs, rinse the fruit and gently pat dry with a paper towel. After cutting the figs (see instructions in recipe for cutting).
- Place the figs in a small bowl and gently toss the figs with brown sugar and cinnamon.
- Place the bowl of figs in the freezer while preparing the flour mixture.
- Whisk the dry ingredients together in bowl.
- Using a paring knife, cut the cold butter into small cubes. This step allows the butter to be cut into the flour mixture easily.
- Using a pastry blender, cut the butter into the dry ingredients until small pea-sized butter clumps are visible. The mixture will begin to look like coarse wet sand. (See picture below for reference.)
- Remove the figs from freezer and using clean, dry fingertips gently toss the figs into the dry ingredients.
- Place the large bowl in the freezer for 10-15 minutes. This step is key! When the butter has been handled it begins to soften and melt. This is especially important on warm or humid days, as the butter will soften quickly. To achieve tender flaky scones and biscuits the butter needs to be cold and hard before going into the oven.
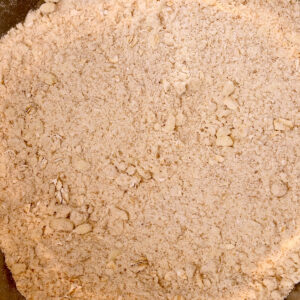
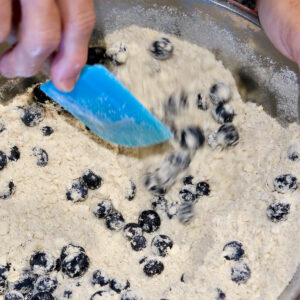
To Mix and Form the Scone Dough:
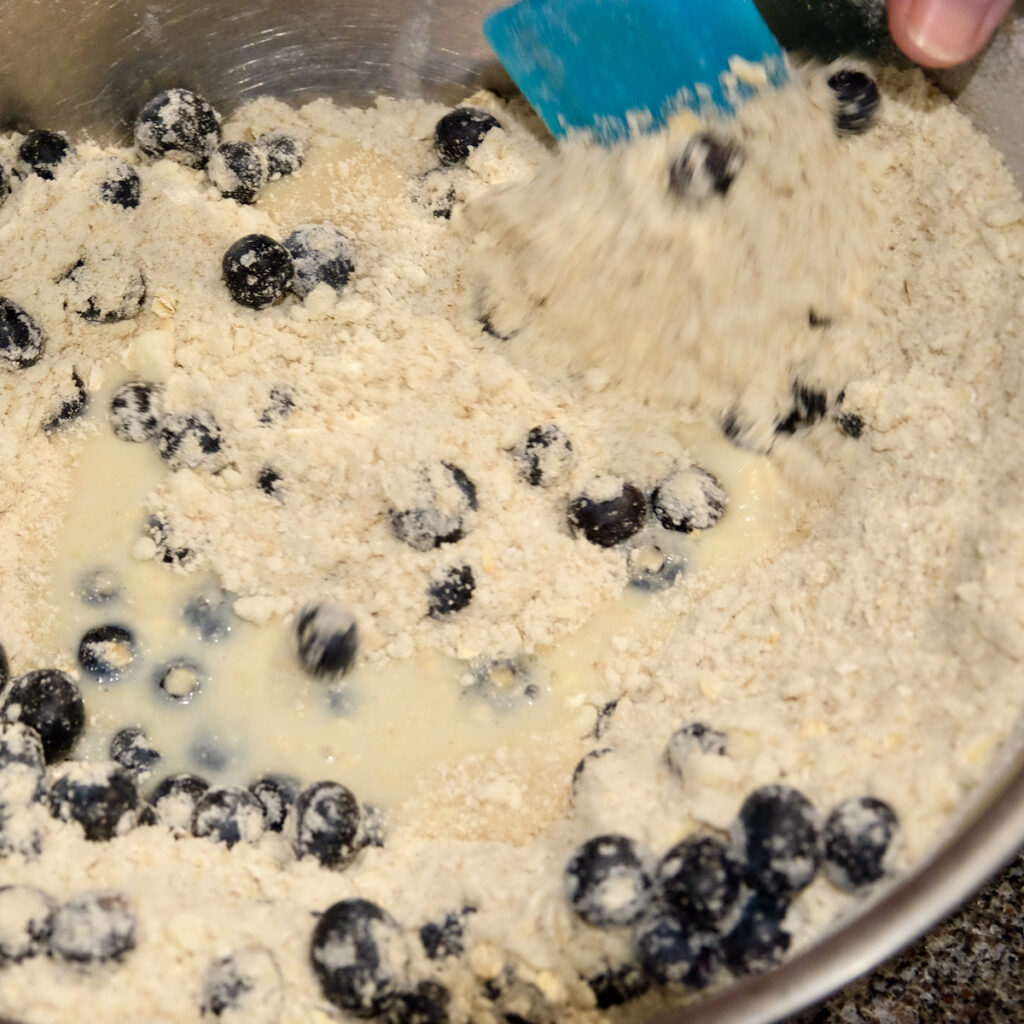
- Measure liquids and remove bowl from freezer. Make a well in the center of dry ingredients and pour in liquids.
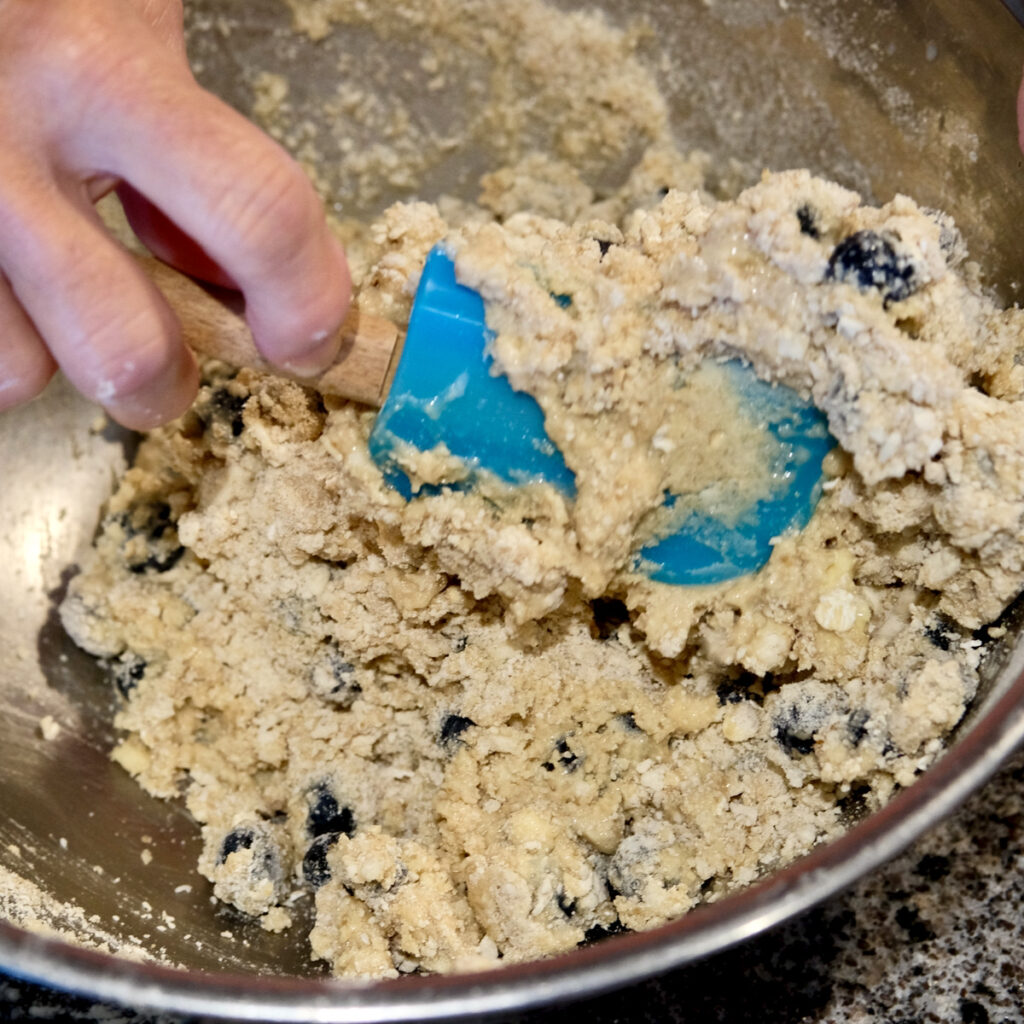
- Using a spatula, gently fold the dry ingredients into the center of the bowl while your free hand turns the bowl. Continue to fold just until all ingredients are blended and begin to come together.
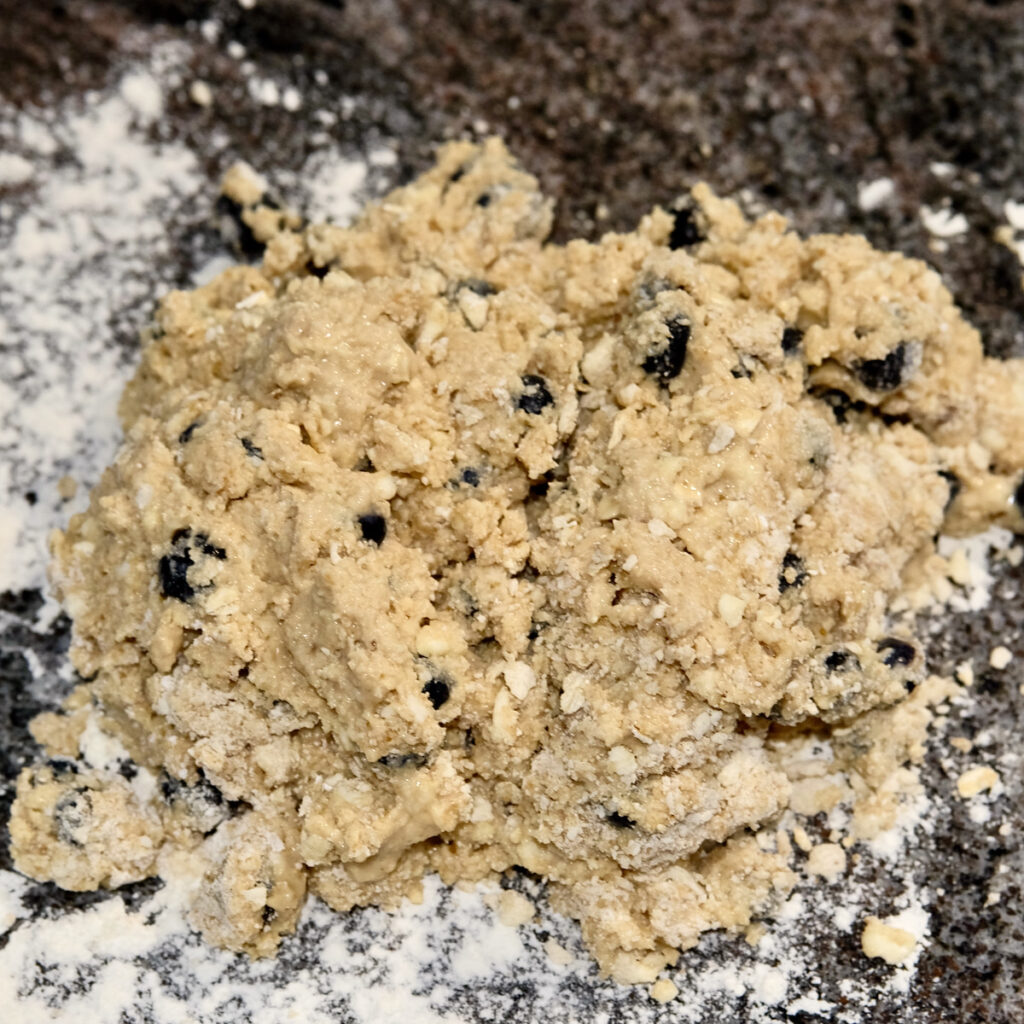
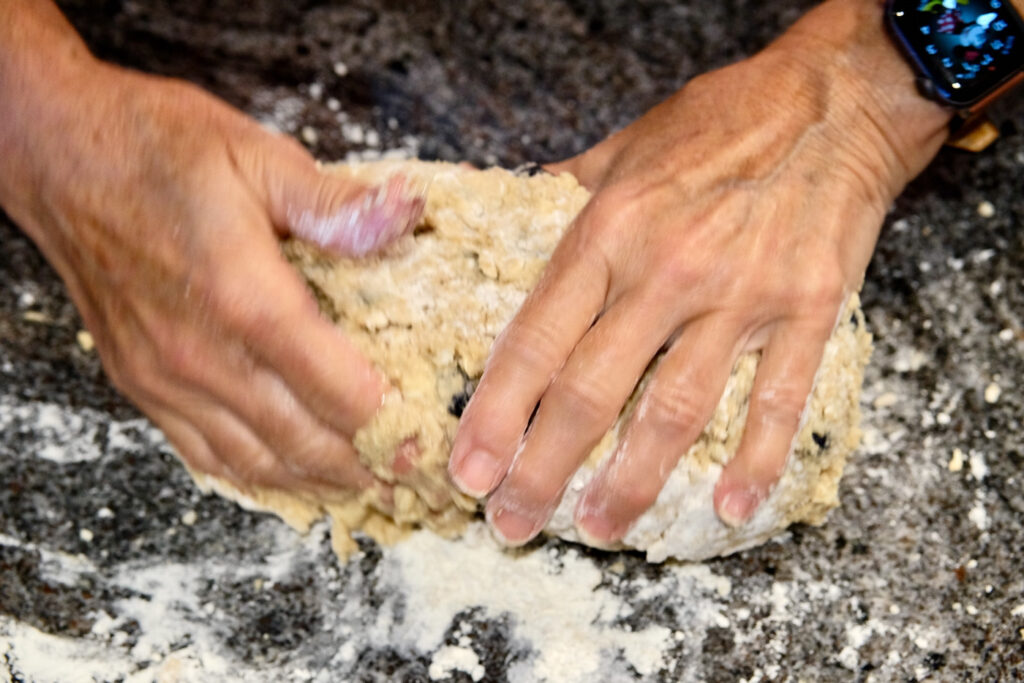
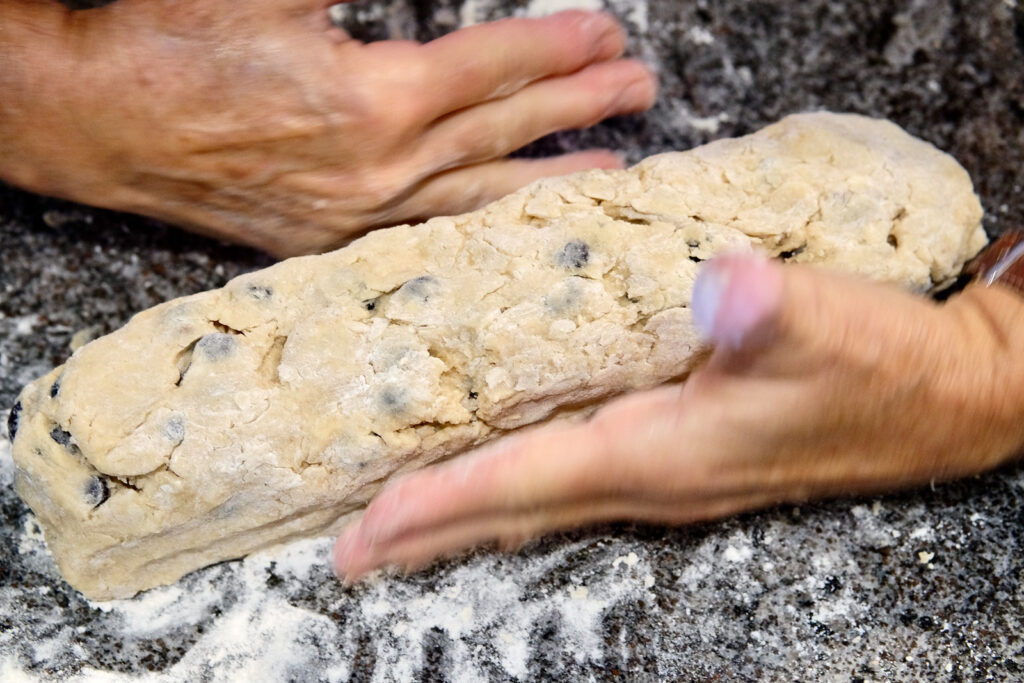
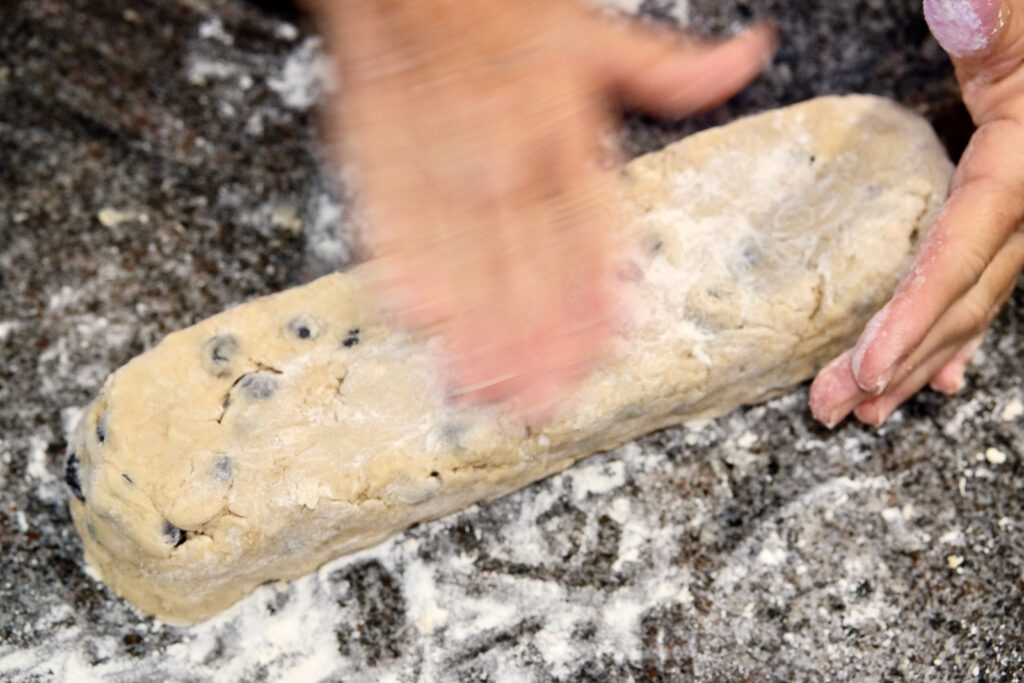
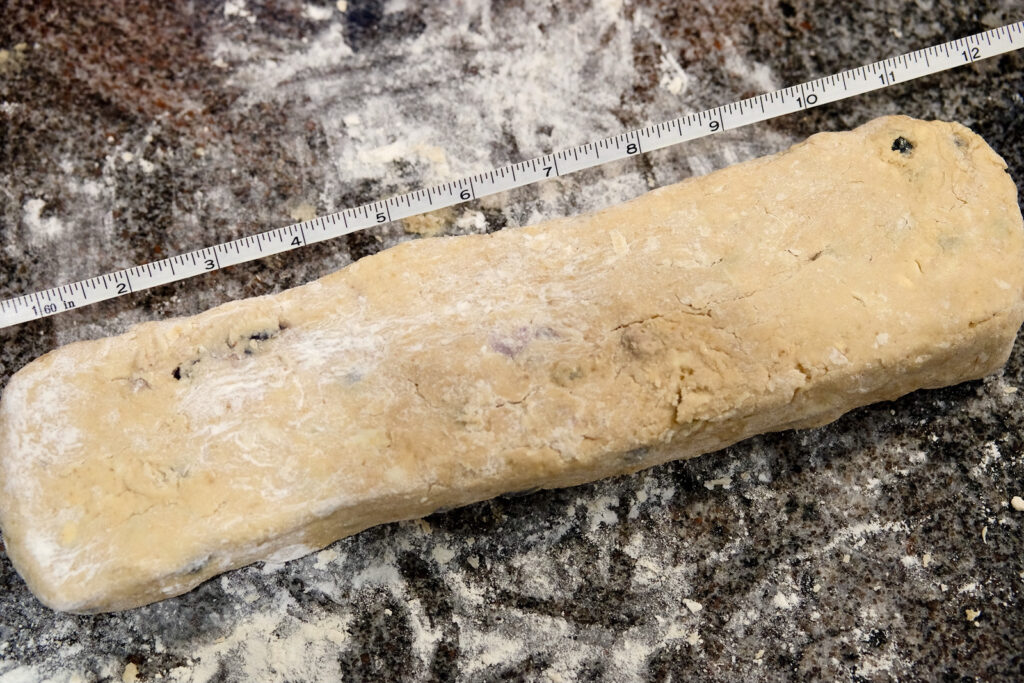
- Turn dough out onto a lightly floured surface. Quickly and gently pat into a 12-inch long rectangular block. The width across the top should measure about 3 to 3 1/2 inches with about a 1 1/2 inch thickness.
Tip for Cutting Scones:
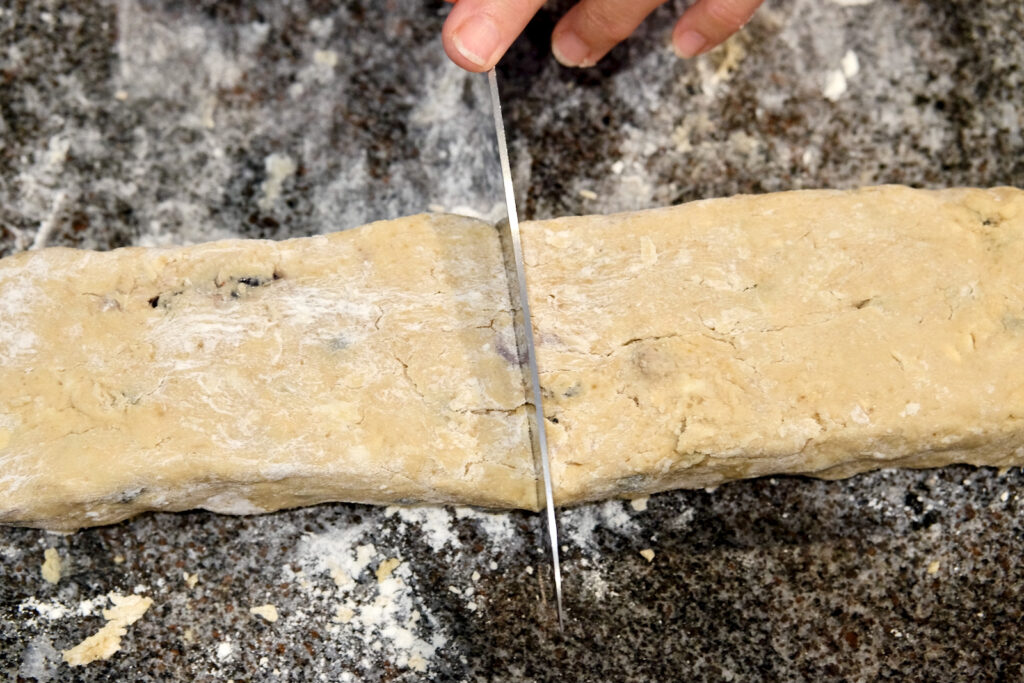
- In order to keep the dough from sticking, lightly flour the knife in between each cut.
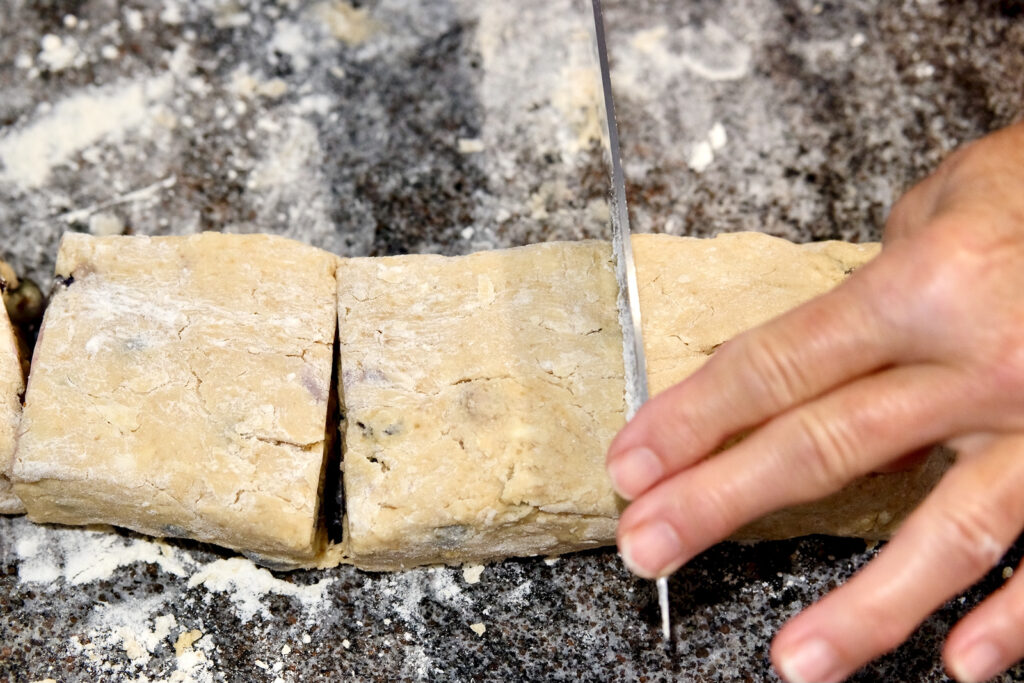
- Using a sharp knife, cut log in half, making 2 logs, 6 inches in length.
- Cut each 6 inch log, in half again, making 4 squares.
- To make the scones, cut each square on the diagonal producing 8 triangles.
- Place scones on prepared baking sheet and brush with cream.
- Bake as directed.
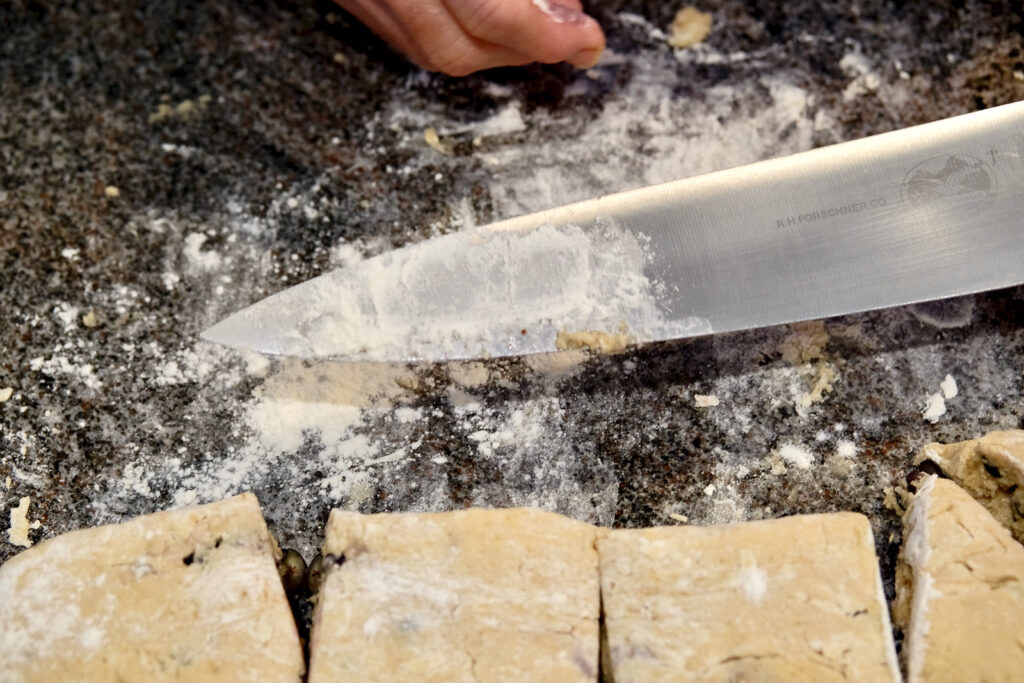
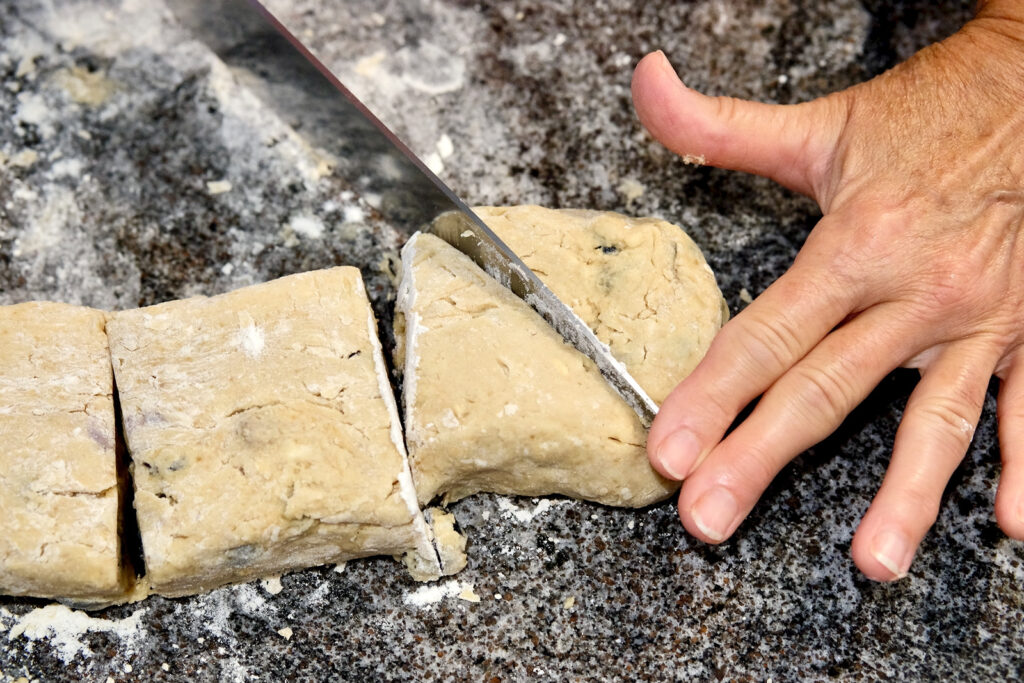
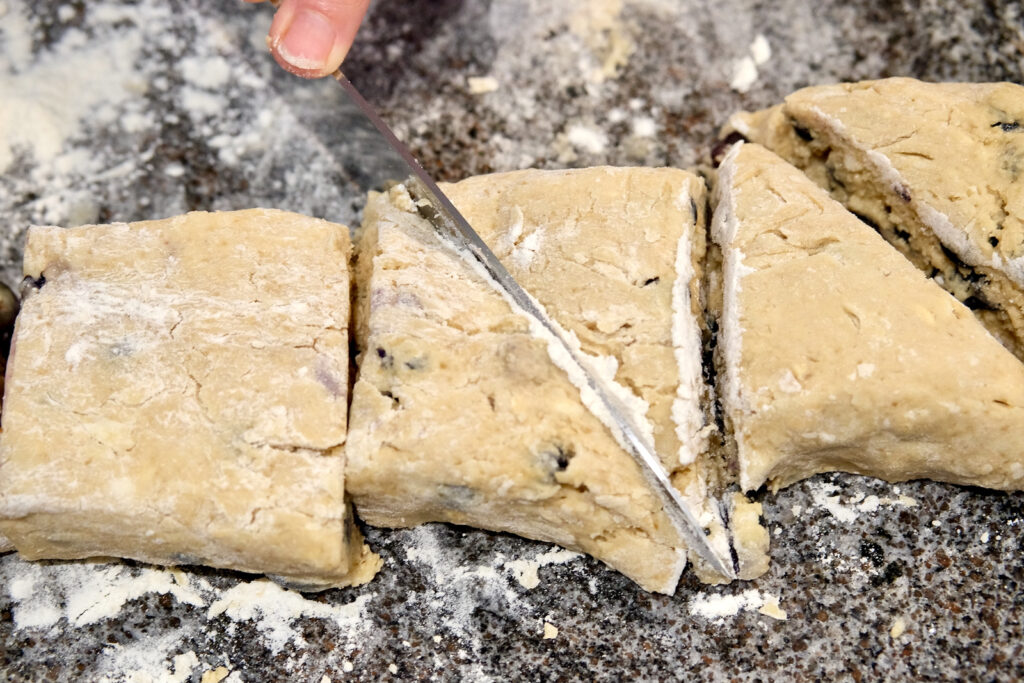

brushing with cream.
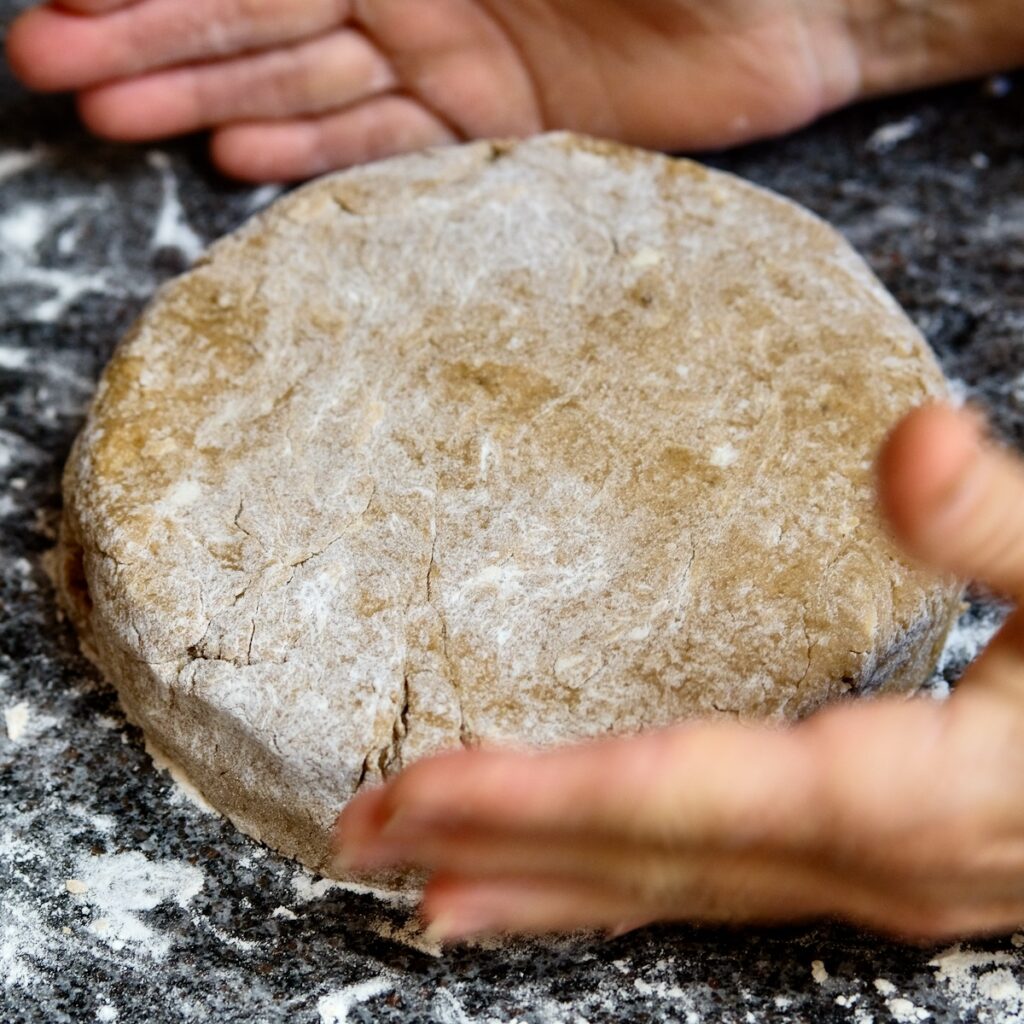
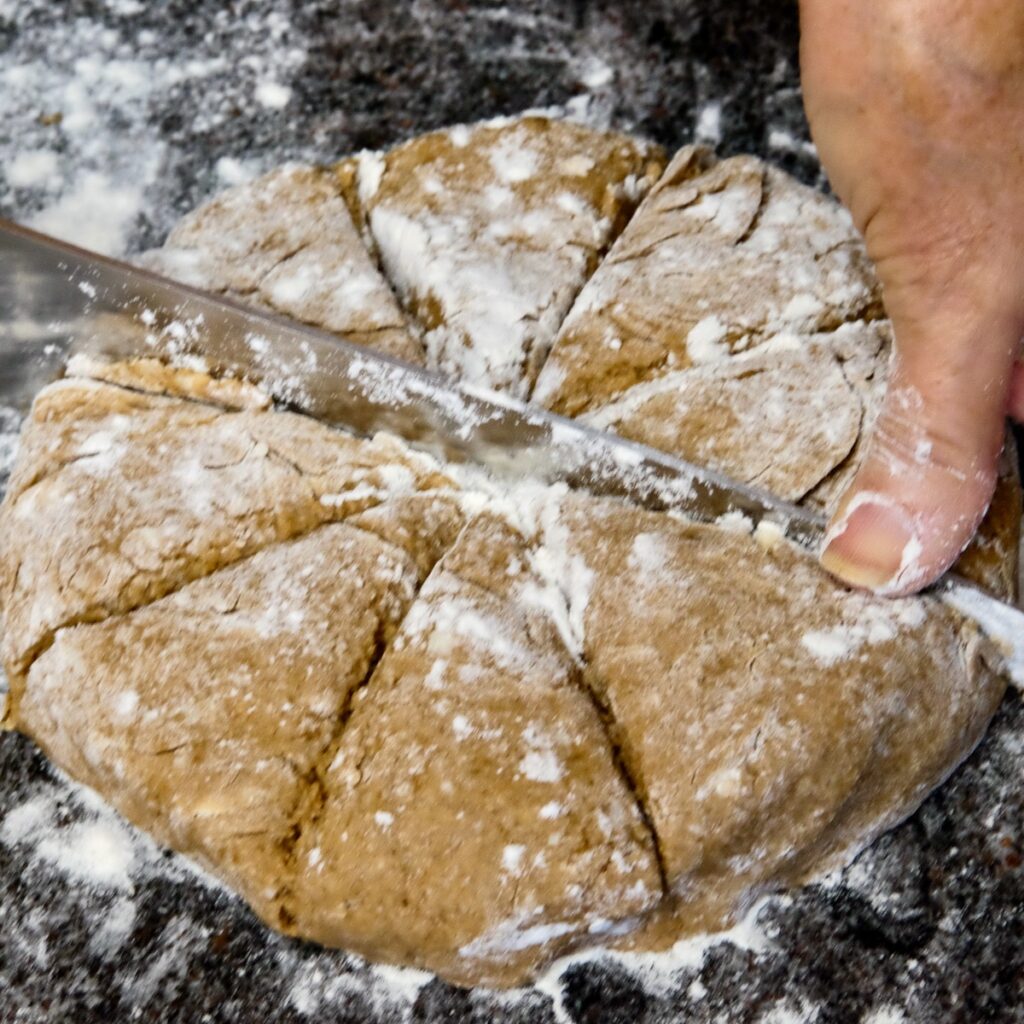
An alternative method is to form the dough into a large disk the shape of a cake pan. Cut the disk into even wedges:
- Using a floured chef’s knife, cut the disk in half.
- Sprinkle a little flour onto the knife before each cut.
- Cut each disk half into quarters.
- Cut each quarter in half, creating 8 equal wedges.
- Place scone wedges on prepared baking sheet and brush with cream.
- Bake as directed.
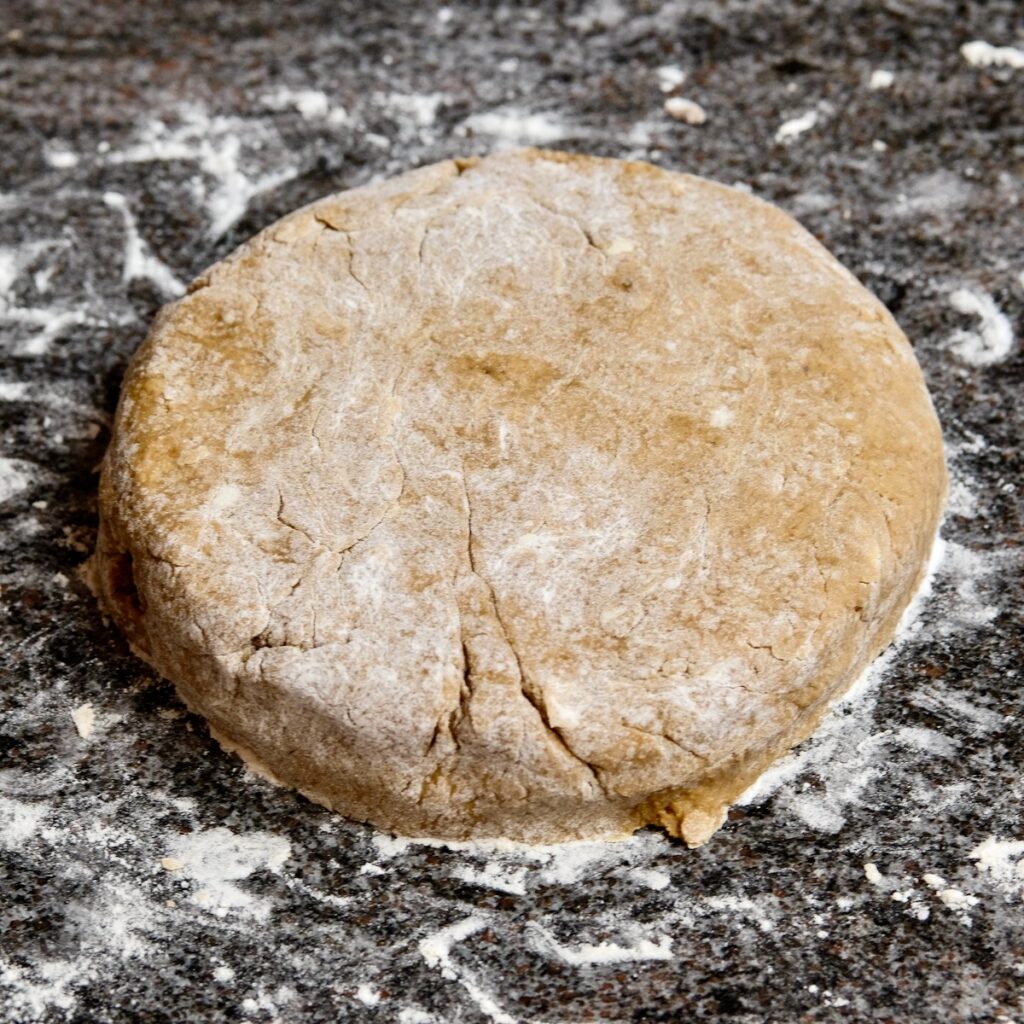
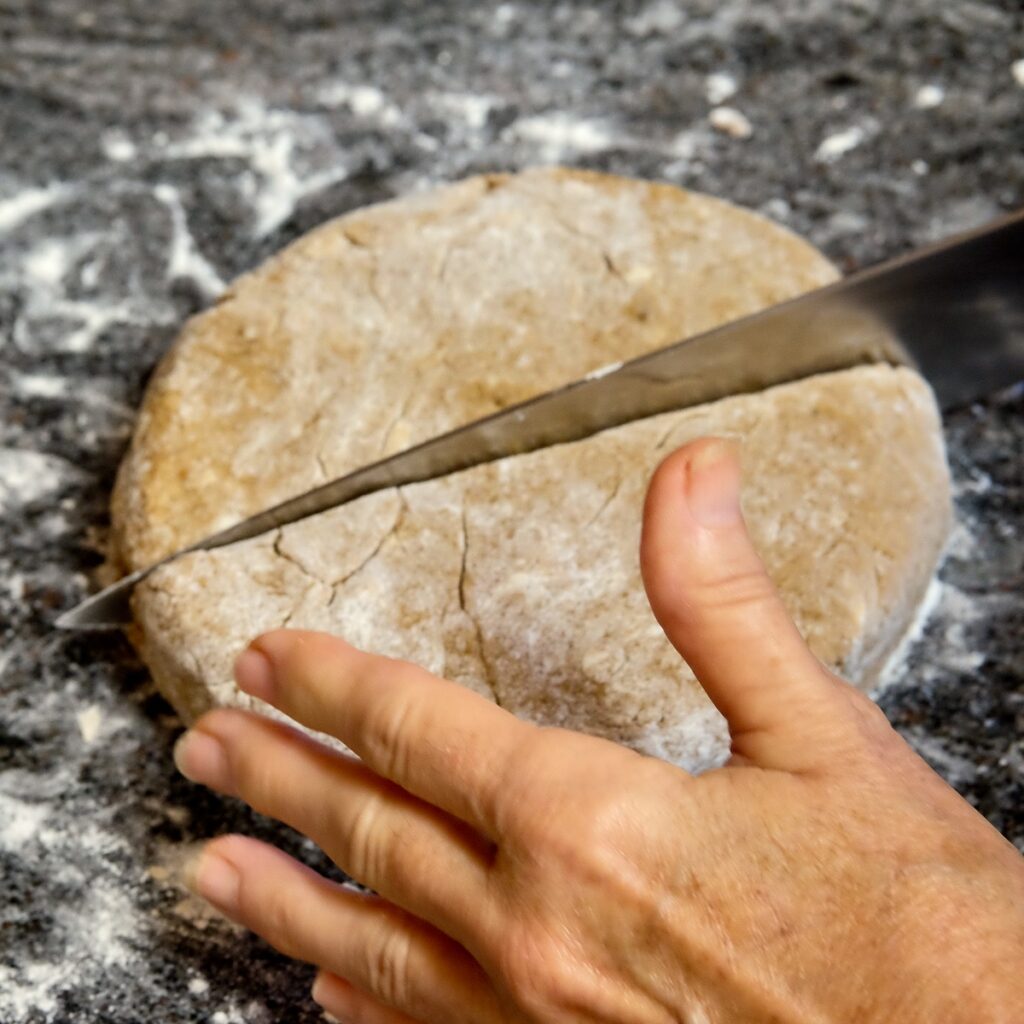
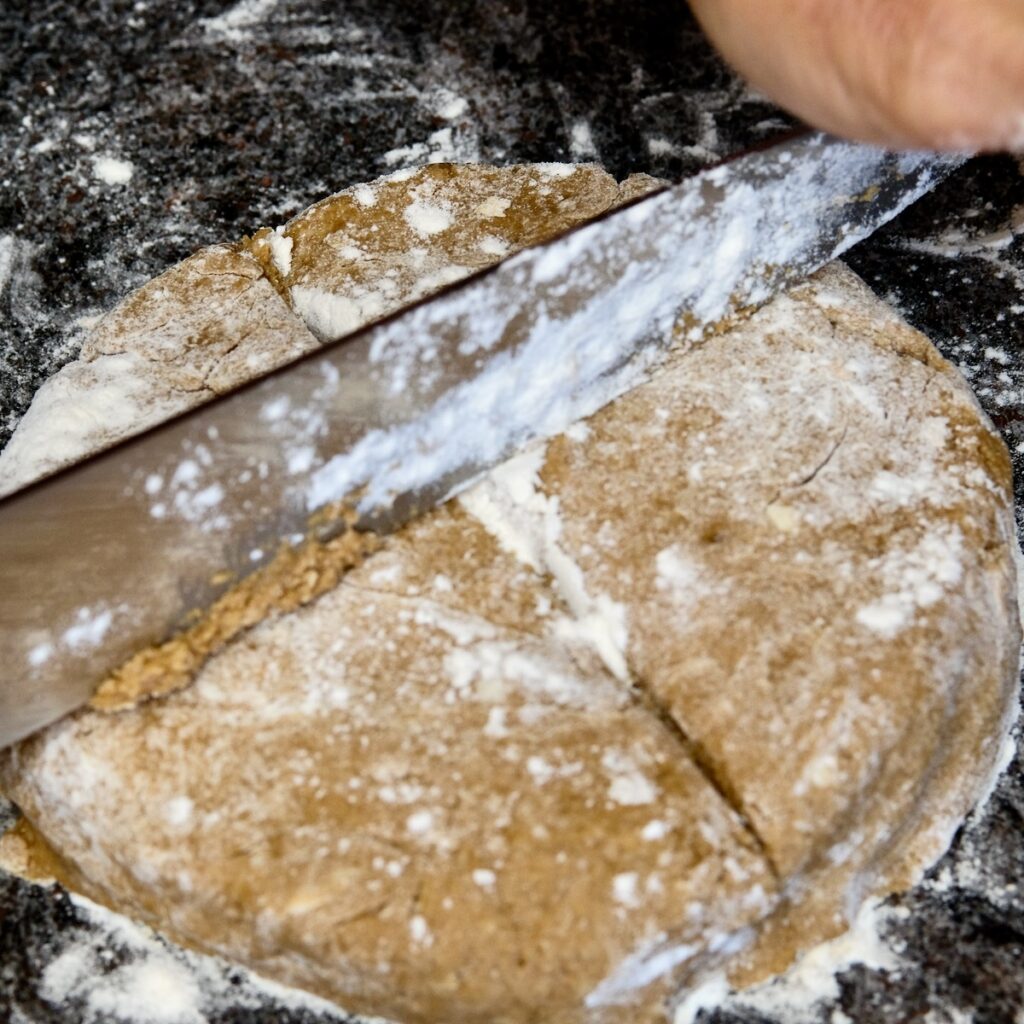
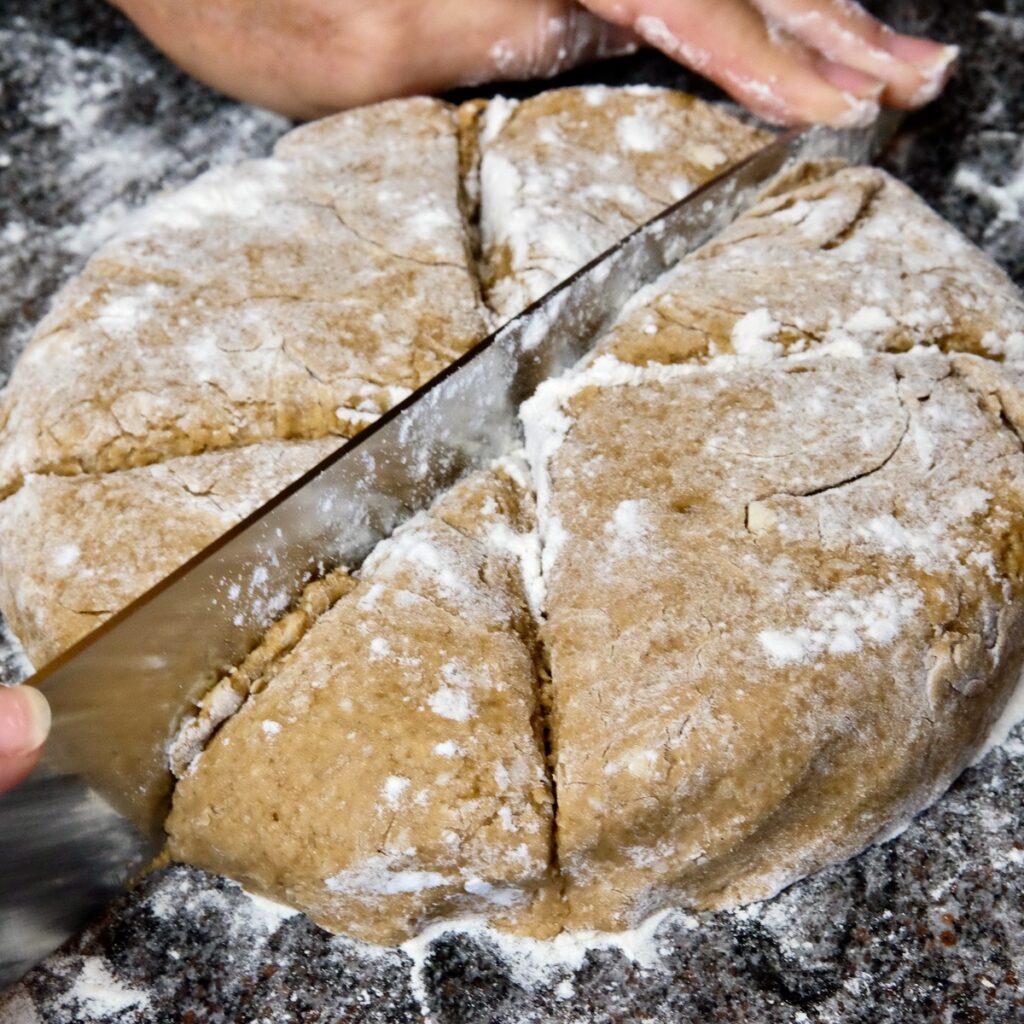
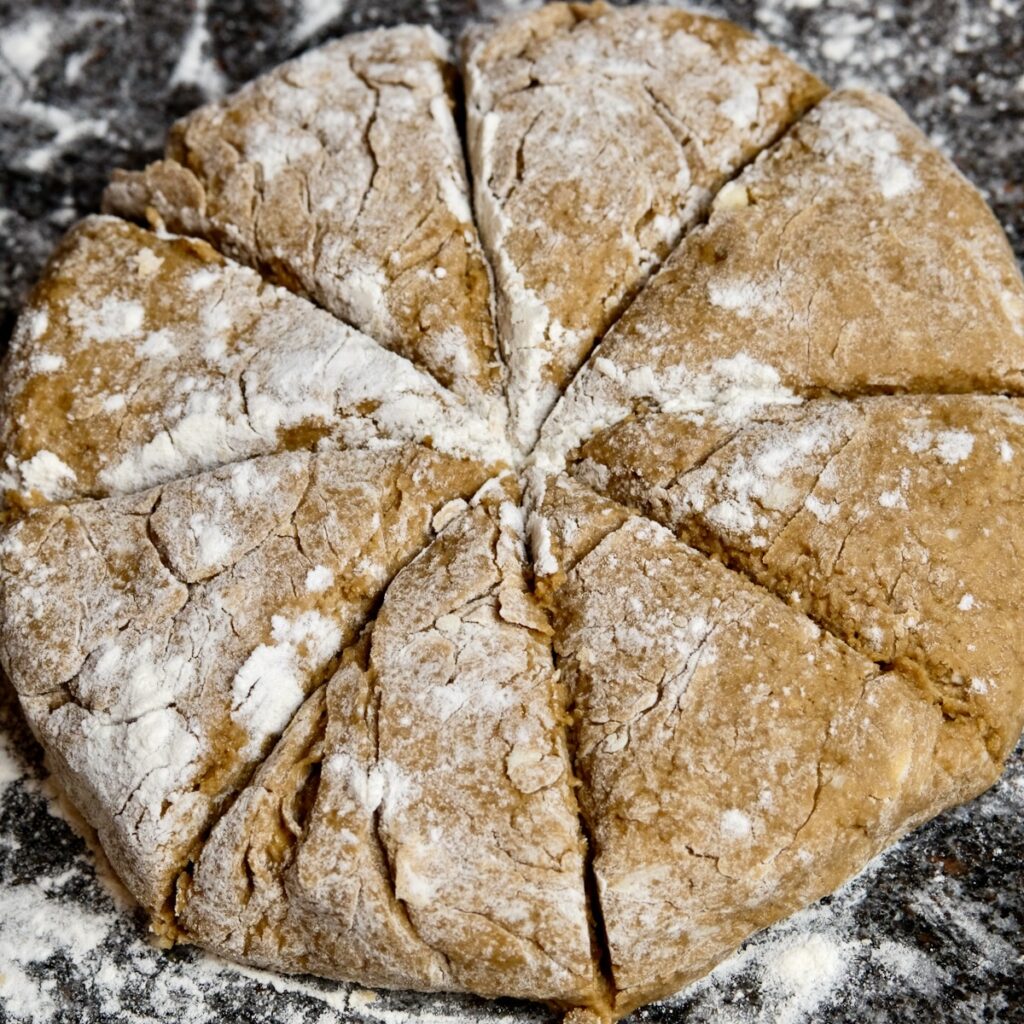
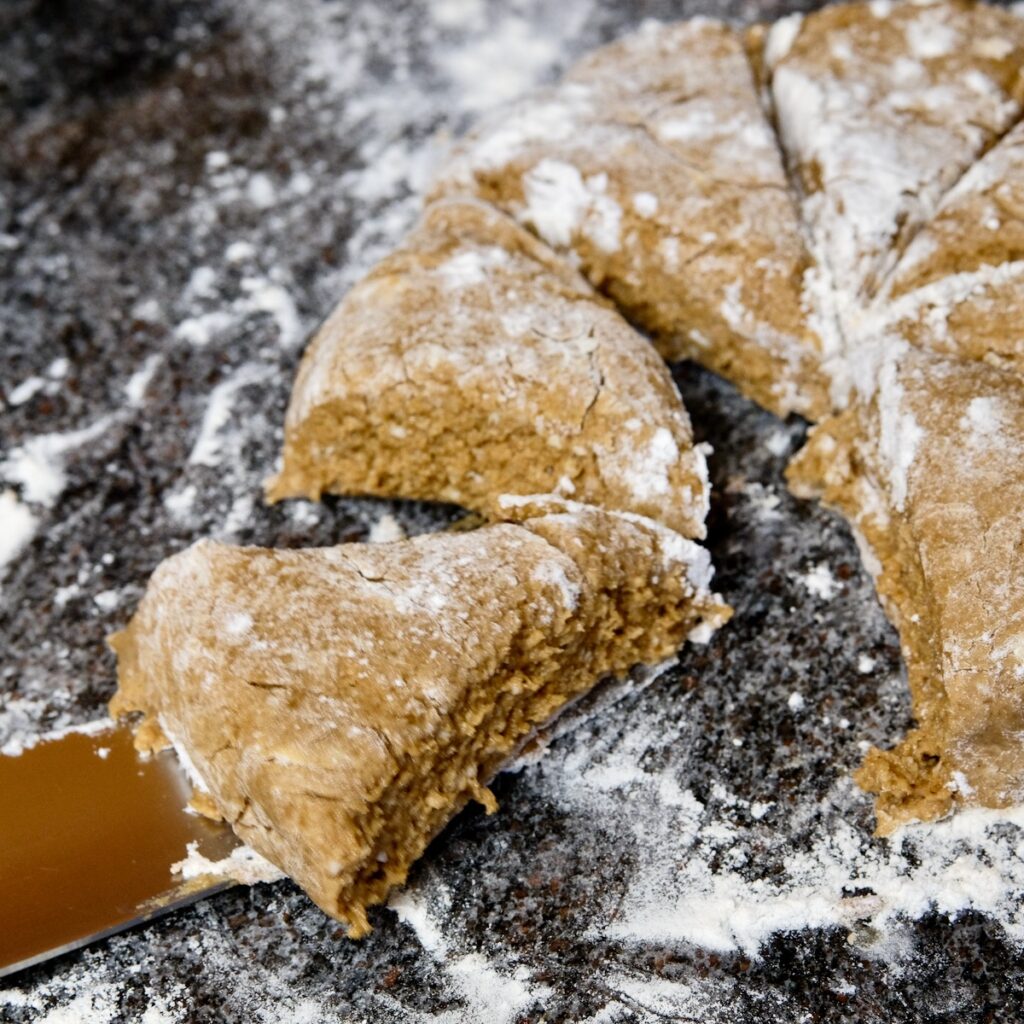
The Big Take Away for Fresh and Tender Fig Scones.
The most important step here is to keep the butter cold. If you feel that the butter in the dough has begun to soften, simply place the formed dough back into the freezer for 5 minutes or so. This can be done, even after the scones have been cut and placed on the baking sheet. If ample room is not available in the freezer, place the sheet pan in the refrigerator for at least 30 minutes.
Meal Prepping scones with fresh fig.
If you prefer, prepar the dough a day in advance or the night before. Wrap well in plastic wrap and store refrigerated until ready to use. When ready to bake, cut and place on pan and continue to bake as directed in preheated oven.
- Mix the ingredients as outlined omitting the final chill of the blended flour mixture.
- Proceed with mixing in the liquids and folding the ingredients together.
- Turn dough onto lightly floured surface and using clean, floured hands form dough into log or disk.
- Wrap formed dough securely with plastic wrap and refrigerate until ready to use.
- Remove plastic wrap from dough and proceed with cutting steps.
- Bake as directed.
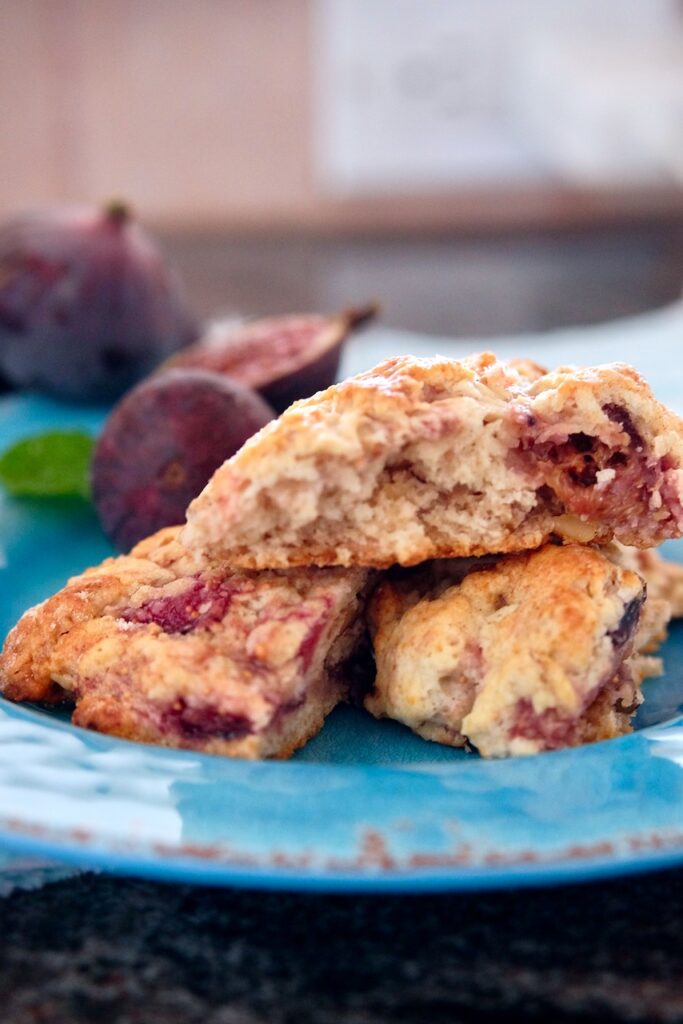
My Favorite Baking Tools for Pan Prepping
I use two methods here. The first one involves my Silpat. Since the Silpat is cleanable and reusable, it reduces waste. However, it does require some cleanup. Nevertheless, not everyone can afford to purchase a Silpat, and some people feel uncomfortable cooking with silicone-based products. With that said, it’s important to be selective about the origin of your cooking tools. When it comes to Silpat, I only use those manufactured in France.

My other option for pan prepping is parchment paper. It helps to make clean up a snap. When purchasing parchment paper or any cooking aid, please pay particular attention to the country of origin. Often times, cheaper does not mean better. For me personally, it is important to pay attention where products such as these are made. I do not want added chemicals or additives leaching into my family’s food.

Buon Appetito!
PrintFig Scones made with Fresh Figs and Walnuts
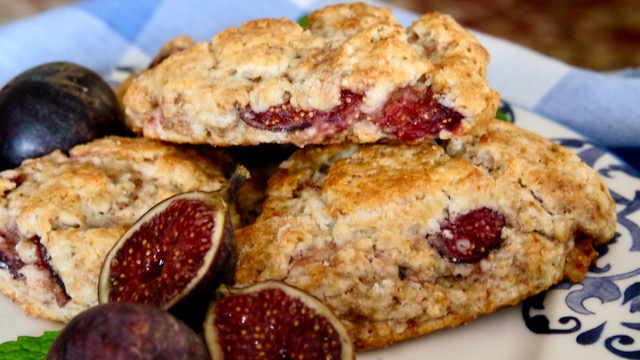
Fresh fig baked into tender scone yields sweet jammy pockets of fruit. This sweet scone has a tender flaky biscuit and makes a delicious breakfast treat. Or this seasonal fruit recipe to bake easy make ahead brunch food.
- Prep Time: 25 minutes
- Cook Time: 15 minutes
- Total Time: 40-45 minutes
- Yield: 8 servings 1x
- Category: Breakfast
- Method: Oven
- Cuisine: American
Ingredients
- 2 cups (250 grams) All-Purpose Flour
- 3 Tablespoon (36 grams) Granulated Sugar
- 1 Tablespoon (15 grams) Baking Powder
- 1 teaspoon (6 grams) Kosher Salt
- 5 Tablespoons (70 grams) Butter, cubed
- 1/2 cup heaping (71 grams) Walnuts, chopped (or other nut)
- 1 cup (155 grams) Fresh Figs, quartered
- 2 Tablespoons (23 grams) Brown Sugar, unpacked
- 1 Teaspoon (<1 gram) Cinnamon
- 1/2 cup (127 grams) Buttermilk
- 1/4 cup (50 grams) Heavy Cream
FOR TOPPING SCONES:
- 1 Tablespoon Cream
- Additional Cinnamon Sugar (optional)
Instructions
- Preheat oven to 425 degrees F.
- Line a baking sheet with a silpat or parchment paper.
FOR THE FIGS AND WALNUTS:
- Choose slightly firmer figs, as they will keep their shape when tossing into the flour. Rinse the figs and pat dry with a paper towel. Peel the skin away if desired, however it is edible. (I leave them on.)
- Cut each fig in half lengthwise from the stem to bottom. Then cut each half into quarters, lengthwise. Finally, cut each quartered fig in half across the middle, creating small chunks.
- Place the cut figs in a small bowl and sprinkle with the 2 tablespoons of brown sugar and 1 teaspoon of cinnamon. Gently toss to combine using your fingertips or a small spatula. Set bowl in freezer to chill while preparing the scone dough.
- Chop the walnuts and set aside.
TO PREPARE SCONE DOUGH:
- In a large bowl, whisk together the flour, granulated sugar, baking powder and salt.
- Using a pastry blender cut the butter into the flour mixture until crumbly. (See picture above.)
- Toss the walnuts into the blended flour mixture.
- Remove the chilled figs from the freezer and gently toss into the flour mixture.
- Place the bowl in the freezer and allow the ingredients to chill for 10-15 minutes.
- After chilling, remove the flour mixture from the freezer.
- Make a well in the center of the flour and pour in the cream and buttermilk.
- Gently fold in the flour from the sides of the bowl into the center, while rotating the bowl in a clockwise manner. Once the dough begins to come together, turn out onto a lightly floured surface.
- Create a log by patting and forming the dough into rectangle measuring 12 inches long by 3 inches wide and 1 1/2 inches thick. (Please see picture gallery for forming a dough log.). Alternatively a cake shaped disk may be formed using the same method.
- Cut log or disk into 8 wedges using a sharp chef’s knife. Dust knife with flour in between each cut.
- Place wedges on prepared baking sheet and brush with the remaining 1 tablespoon of cream.
- Sprinkle with cinnamon sugar or sugar crystals, if desired. (Optional)
- Place scones in oven and bake at 425 degrees for about 15-18 minutes.
- Scones are done when tops and edges are golden in color and firm to touch.
- Remove from oven and serve.
- Leftovers should be stored refrigerated, in an air-tight container for up to 5 days.





A DF review! I made this with almond milk (added lemon juice for a buttermilk sub) and DF creamer (thinner than heavy cream), as well as DF butter. Overall, the batter was too wet to work for scones and I was hesitant to play around with adding flour, so I made it into muffins. 375F at 22mins. Delish! I’ll try again with different substitutes to see if I can get a drier scone texture with the batter!
Hi Alexa! Thank you for sharing your experience creating a Dairy Free Fig Scone. I know that there are
others who will be interested in your results. Please come back and give us updates to your creation!
Thank you so much for your lovely review!
Buon Appetite!
I’ve made this 3 times. I too was concerned about the scones spreading too much so I placed each scone within an English muffin ring. I just made 6 large scones. I substituted home-milled whole wheat pastry flour for the ap flour. Home milled flour has a higher oil content hence my concern about spreading. They were delicious but definitely would have spread too much if not confined.
Roberta,
Thank you for letting other readers know about your experience using home-milled whole wheat pastry flour.
I’m sure that they will find this very helpful. And I’m so happy to hear that you enjoy this recipe!
Thank your for taking the time to write a review and for the 4 stars….
Happy Baking and Buon Appetito!
This review is one that followed your recipe without changes to make it a review of your recipe, not a review of a different recipe. 😉
When I rolled into a log I lightly floured my parchment and wrapped dough over with parchment ends, squeezing gently and formed into log without touching the dough… then cut. Worked like a charm. No complaints of sticky dough or runny dough needing any device to hold shape. Perfection is what I call this recipe just as written. Yummy 😋
Joyce,
Thank you for sharing your technique using parchment paper for handling the dough.
I’m sure that many readers will find this tip useful. I’m so happy that you enjoyed
this recipe and found the format easy to follow.
Thanks for such a lovely review and five stars!
Buon Appetito
Mia
This looks so good! What a great combination of flavors!
Thank you Suzanne! They are quite yummy!
Thanks for sharing! Does it keep long?
They will keep up to a week, stored in an air tight container and refrigerated.